This easy homemade New York-Style Bagel recipe is simply the best! Basic pantry ingredients transform into deliciously chewy freshly made New York bagels.
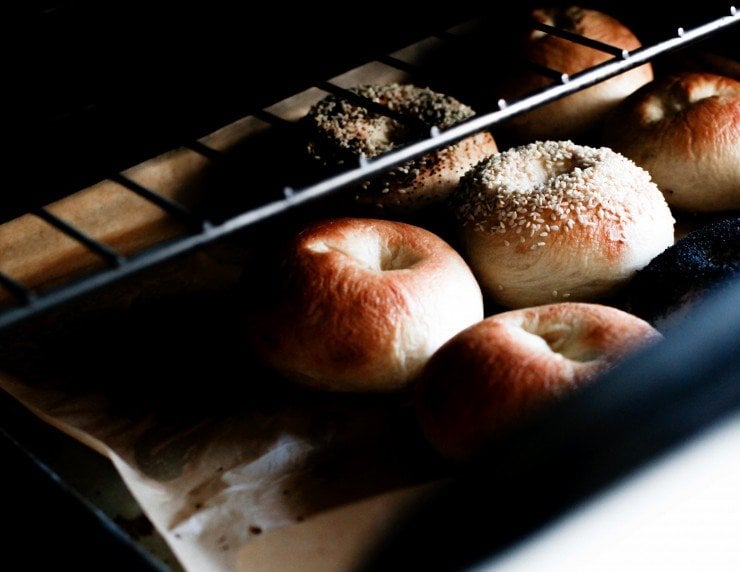
This is simply the best homemade New York-Style Bagel Recipe. After so much love (this recipe has received over 11 years worth on here!), I had to share the recipe in Hand Made Baking, and I updated this page with various photos, tons of tips, tricks, and information you’ll need to achieve the most perfect chewy homemade bagels.
This easy bagel recipe is delicious and results in perfection. It does not need as much dedication as other bagel recipes you will find on the web– you do not need to dedicate 2 days to this. It’s a same-day homemade bagel recipe that comes together in 2 hours.
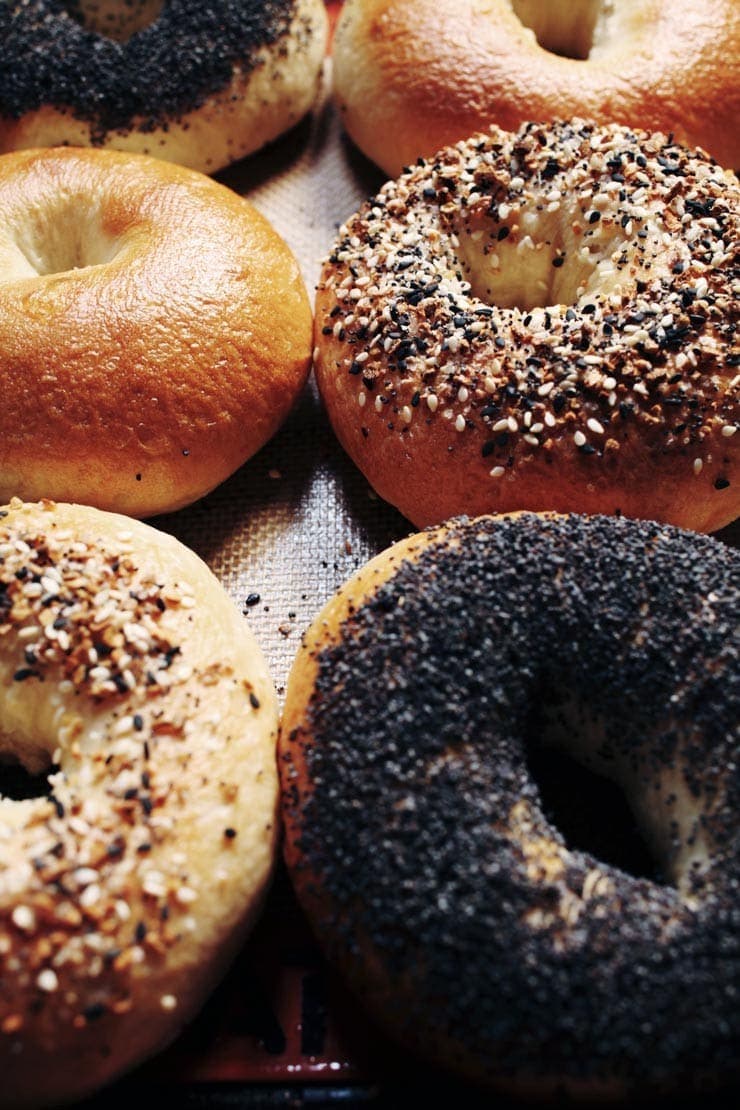
As a native New Yorker, I know there’s nothing better than a fresh bagel schmeared with cream cheese. I have a high standard when it comes to bagels and I don’t put unusual ingredients in mine.
In these bagels, you will not find any yogurt, maple-syrup, or ingredients you might not have in your pantry.
I no longer live in New York City, and I constantly crave the good old-fashioned bagels I grew up on– flavorful, modestly sweet, and chewy with soft, shiny crusts. These bagels are made the classic way: you boil them in water for a couple of minutes before you bake them. This is probably one of the most bizarre things a person can do to dough, but it just works.
This bagel recipe is a very altered adaptation of one from a cookbook, Ultimate Bread, that I borrowed over a decade ago from my aunt. It was my first introduction to homemade bagels. Over the years, this has become the best bagel recipe that I’ve ever made.
It doesn’t require unusual ingredients or require special equipment to make the recipe. These homemade chewy bagels are a treat fresh out of the oven, but when they’re toasted– oh, my! Can we just say that you’ll be making this bagel recipe time and time again?
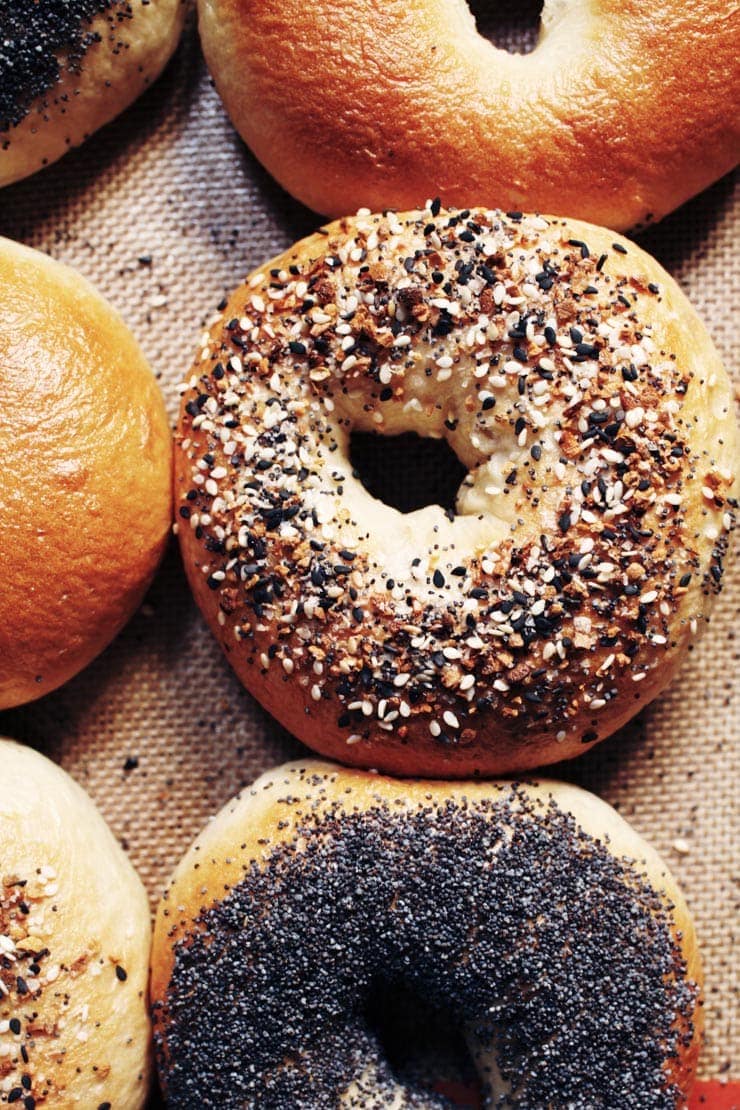
After making this New York-Style bagel recipe on your own, you will feel a sense of accomplishment and satisfaction. I know I always do! This will definitely give some competition to your local bagel shop- the recipe is that good (I mean, look at the comments!).
This homemade bagel recipe is so good that you’ll be impressed with yourself and totally satisfied after you take a nice bite out of one of these freshly made chewy bagels. So, if you mail order bagels from your favorite spot in New York City and pay $7.50 a bagel, save your money!
And if good bagels cannot be found where you live, worry no more; this recipe is infinitely adaptable, and the little bit of effort you put into making these bagels is well worth it. It’s time to get baking!
Homemade Bagel Recipe Ingredients
This homemade bagel recipe consists of four major parts– making and preparing the bagel dough, shaping and boiling the bagels, the bagel topping, and the things you’ll need to serve them with. Here’s what you’ll need:
The Bagel Dough: The Bagel Recipe Ingredients
- Granulated Sugar: This is used to slightly sweeten the bagel dough and to activate the yeast.
Feel free to use natural cane sugar here if you have it. - Active dry yeast: Yeast is used to help the bagel dough form and rise.
- Luke warm water: This needs to be between around 105ºF/ 40.5ºC and 115ºF / 46ºC; this will also help the yeast activate and bind the flour and other ingredients into a smooth, elastic bagel dough. On the rare occasion, you may need more water than listed in the recipe. The water called for in the recipe is a guide– your ultimate goal is to form a smooth bagel dough that is moist and firm.
- Bread flour: Bread flour contains a high protein content, perfect for making homemade bagels that are chewy. All-purpose flour works here too, they will be just as delicious– just not as chewy as ones made with bread flour (Read: New York-Style Bagel Recipe FAQ located below the recipe in this post for more information about flour alternatives for these homemade bagels).
- Fine-Grain Sea Salt: Salt adds the right amount of flavor to the bagels.
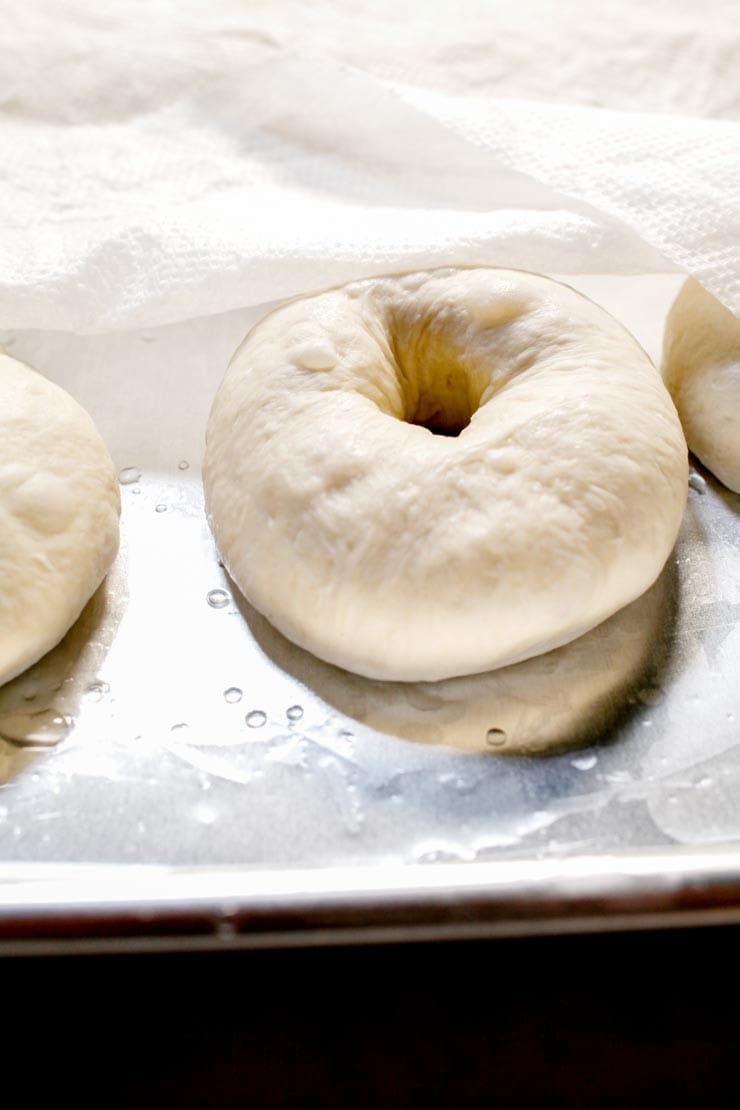
Shaping and Boiling the Bagels
There are many methods in which you can shape a bagel; there is a more traditional method that many bagel shops use– you roll the bagel dough into logs and bind the ends together.
The method used here is done by simply poking the hole in the middle of taught rounds of bagel dough. Once that is done, the bagel rings are gently stretched to about a third of the diameter of the bagel.
After a short rest, each bagel is boiled. This gives the bagels their New York-Style signature delicious, chewy, and shiny crust.
Read more: New York-Style Bagel Recipe FAQ located below the recipe section in this post.
While you can opt to flavor your poaching liquid (there’s more information about this in the FAQ section), I keep it simple here and just use water and these come out perfect every time.
The Bagel Toppings
Favorite bagel toppings vary from person to person. Depending on the day, I like a good homemade everything bagel or a poppyseed bagel. I know many people who are partial to single toppings like minced onion or coarse salt. Whatever you like, definitely customize the toppings to match your tastes.
Everything bagel seasoning, minced fresh garlic, minced fresh onion or shallot, poppy seeds, sesame seeds, caraway seeds, coarse salt, cinnamon sugar- these are just some of the many topping options you can go with to customize the taste of your bagels.
What to Serve the Bagels With
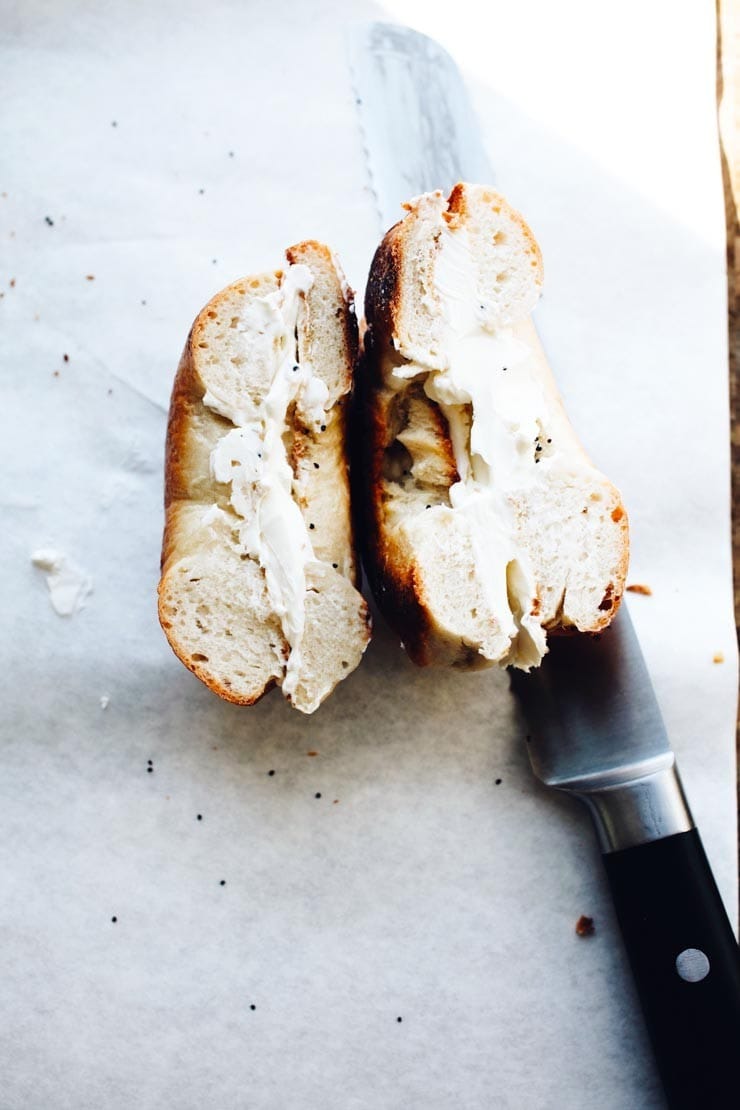
A proper New York-Style bagel always requires a schmear. What is a “schmear” you ask? It’s a generous slather of cream cheese. It’s practically a requirement, especially when these homemade bagels come out of the oven. However, there are multiple ways you can serve them– all of which I have listed within this post.
How to Make Homemade New York-Style Bagels
First, proof the yeast. Proofing basically means you’re activating the yeast. To do this, you will need to add sugar and yeast into luke warm water. After about 5 minutes, the yeast will bubble up; this indicates that the mixture is ready to stir until everything is properly dissolved.
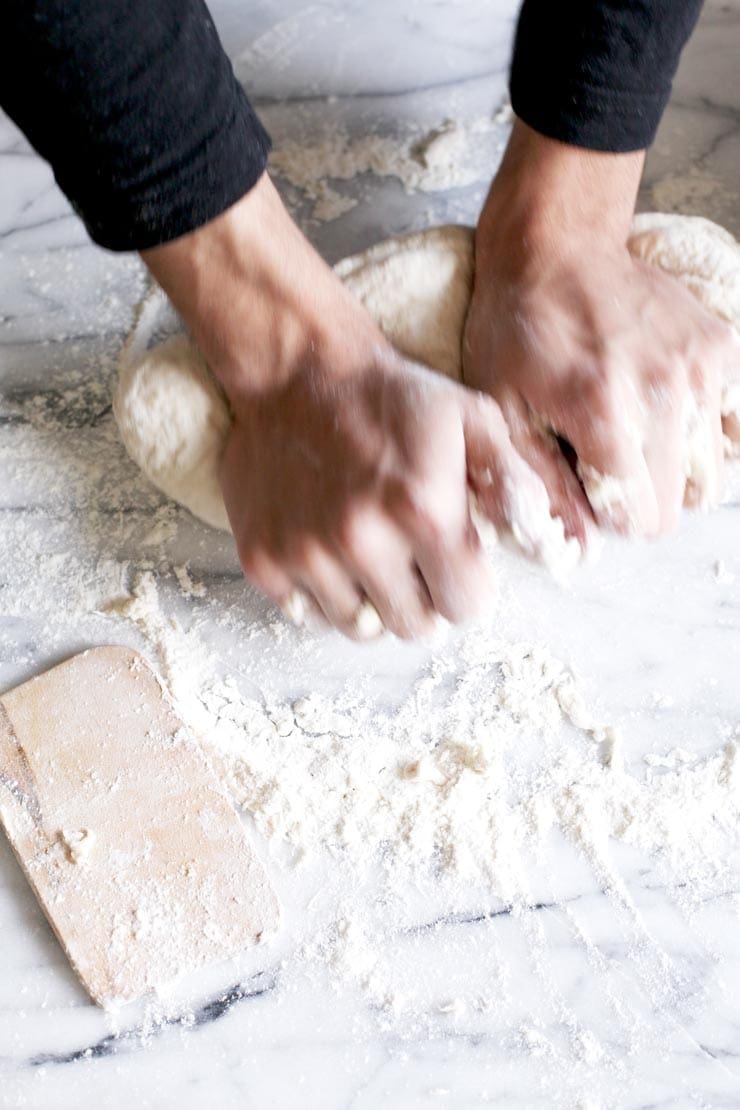
Then, mix the bagel dough together. You can you can opt to make the bagel dough by hand (which I highly recommend if you’re making this recipe for the firs time), or you can do so with a stand mixer fitted with the hook attachment, on the lowest setting (for about 5 to 6 minutes). If you’re making a double batch you might not be able to use your stand mixer for kneading– refer to your manufacturer’s instructions.
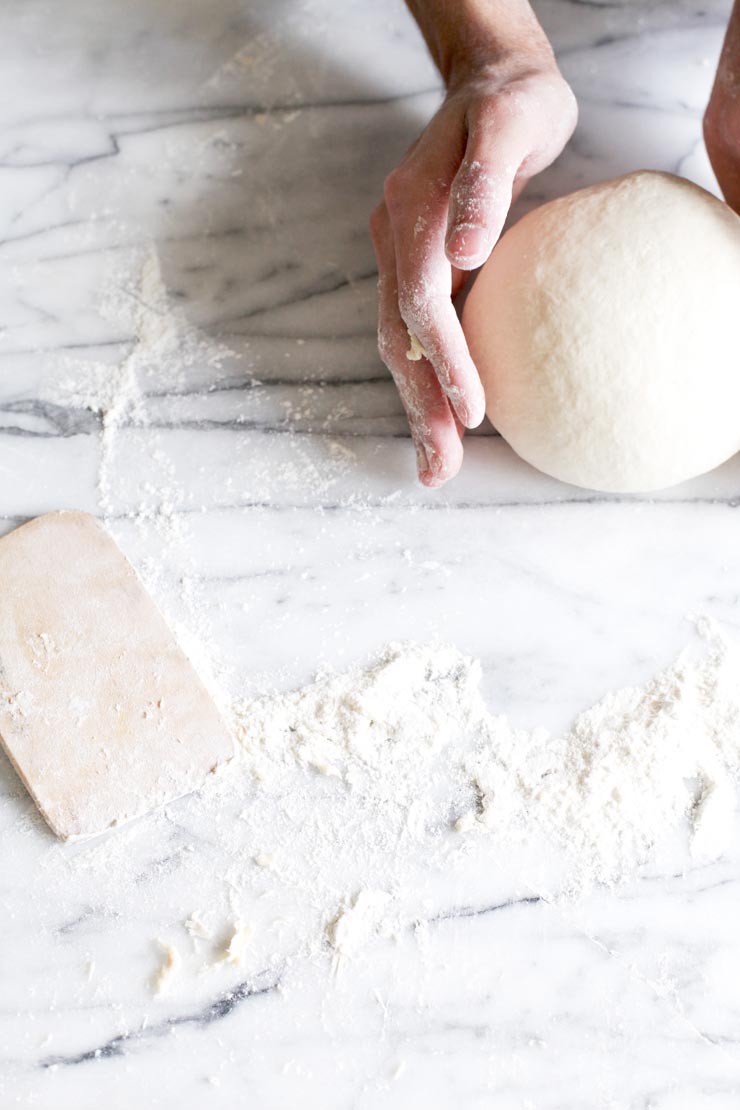
When mixing the bagel dough, you may or may not need the entirety of the water called for in the recipe. You want the bagel dough to be moist and firm after it is mixed. Sometimes you may need more water, depending on humidity, brand of flour, your altitude, climate, amongst many other things.
Once the dough has come together and has been kneaded, place the bagel dough in an oiled bowl to rest for an hour (about 2 hours if you’re using less yeast) or covered overnight in the refrigerator.
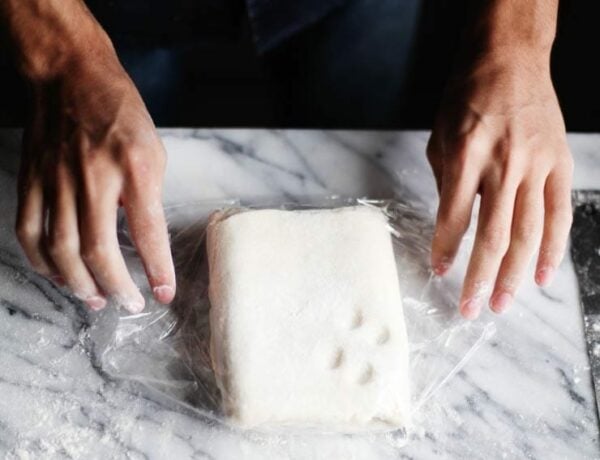
Once the bagel dough has rested, you will need to deflate it. You will know it has rested enough when you poke the dough with your finger and the impression remains. If it bounces back, the bagel dough has not risen enough.
If you allowed the bagel dough to rest in the refrigerator, allow it to sit at room temperature for about 1/2 hour before working with it.
Once deflated, divide the dough. It should be divided into 8 equal portions. Feel free to use a scale or eyeball it. You do not have to be exacting about this; just make sure they’re roughly even so that all the bagels bake at the same time.
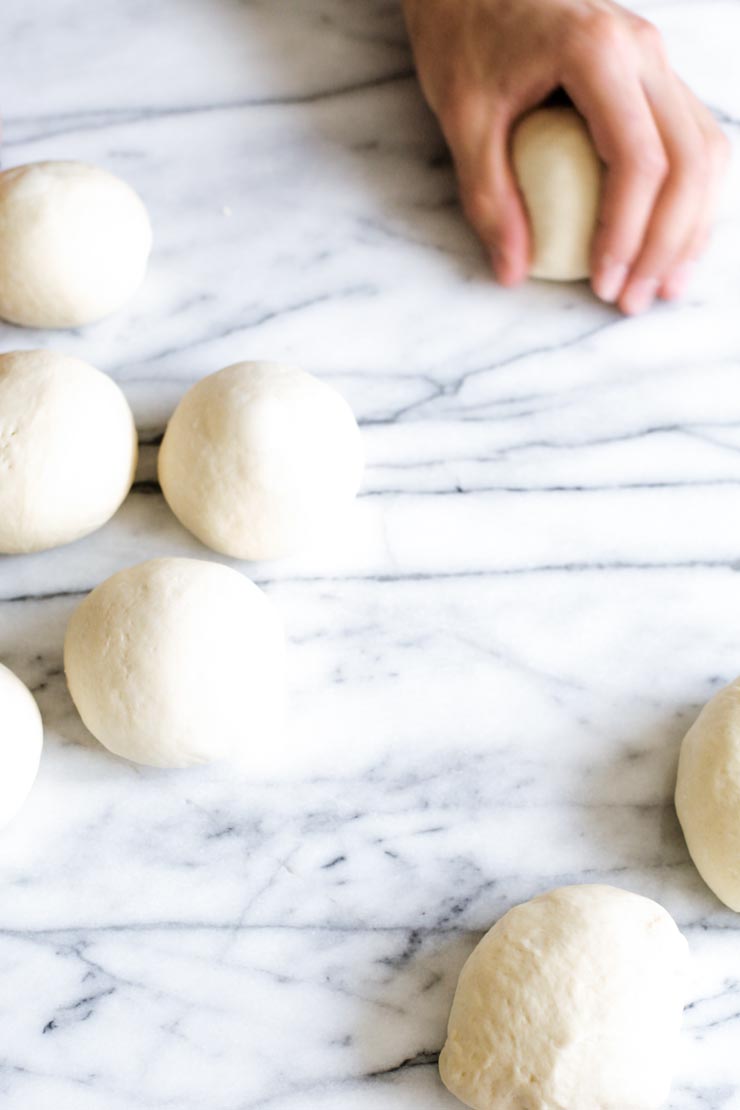
After that, form the bagel dough portions into rounds. Don’t use flour for this step. This is going to sound more complicated than it is, but hold your hand in a C shape while cupping a portion of dough.
Press the dough against the work surface (remember to avoid flouring it) and move your hand and the dough in a slow, circular motion. Allow the irregular edge of the dough to pull onto itself, while decreasing the pressure on top of the dough slightly until a perfectly smooth round ball forms.
Repeat this with the other portions. Have your eyes crossed? This probably does sound difficult at first, but essentially all you’re doing is making the dough round taut by pulling its sides in and keeping it round.
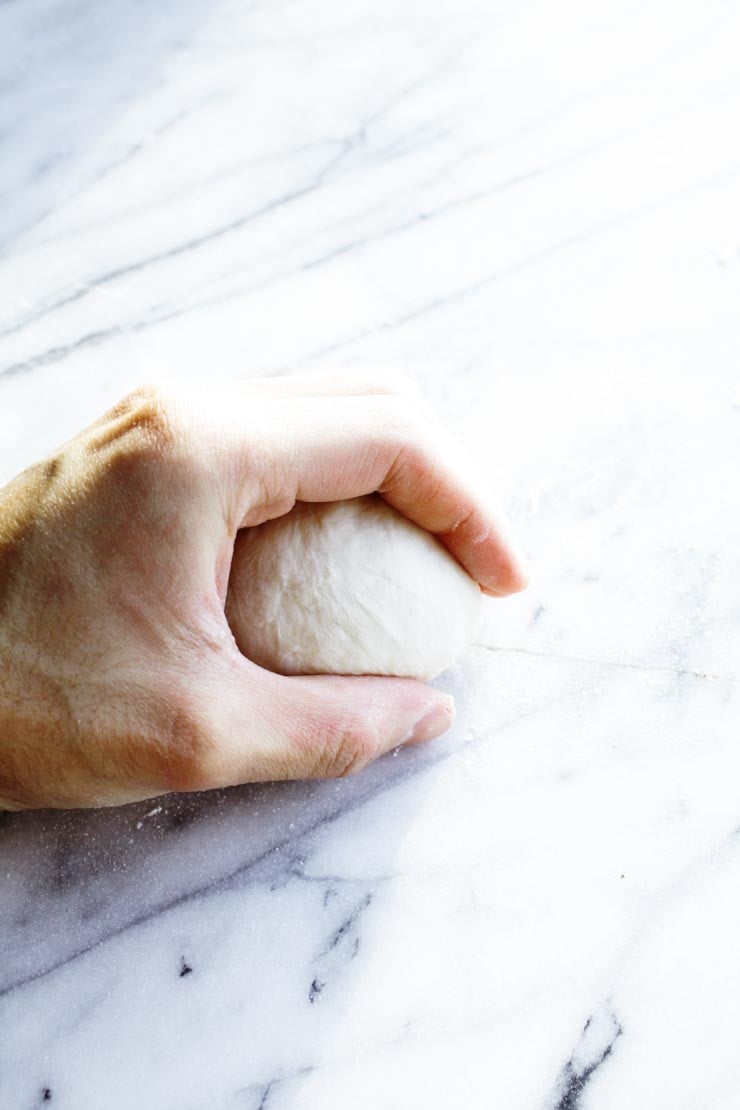
Now, here comes the part when we shape the bagel dough! Working gently and firmly with the dough will result in perfectly smooth bagels.
Simply coat a finger with flour and gently press your finger into the center of each dough ball. Then you stretch the rings out to about a third of the diameter of the bagel and place them onto a prepared baking sheet.
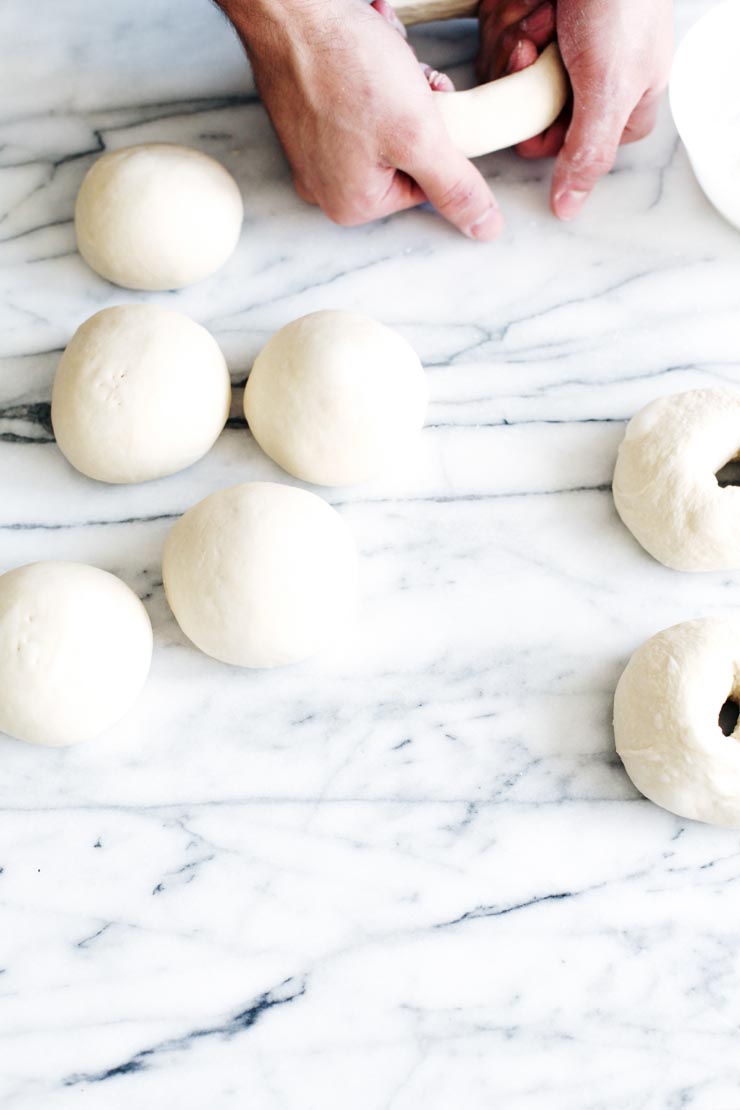
It’s time to boil the bagels. The bagels need a little rest in between shaping and boiling. So, while the unbaked bagels rest, bring a large pot of water to a bubbling boil.
Once it has reached a boil, lower the heat to a simmer. You’ll need a slotted spoon or a skimmer to place the bagels into the water. Some folks like to use small squares of parchment that they cut up before hand. Do what is most comfortable for you.
Handling the uncooked dough with the utmost care will preserve their shape as well.
Boil the bagels and don’t overcrowd the water. Boil as many bagels as you can comfortably fit into the pot. They will puff up quite a bit, so do keep in mind they do need some breathing room.
Once in the water, the bagels will float on the top. Let them sit for 1 minute, then gently flip them over to boil for another minute on the other side.
This will give them a nice crust and their signature New York-Style chew. You can go a little bit longer on the poach, as well. This will give them a stronger crust and chew– more on that in the recipe.
After boiling them, top the bagels! This is the time when you can let your creativity run free. You can use any or all of the topping options listed in the recipe.
Often times I do a combination of toppings to make a delicious homemade everything bagel. Sometimes I just keep it plain or stick to one ingredient on each bagel. Be creative!
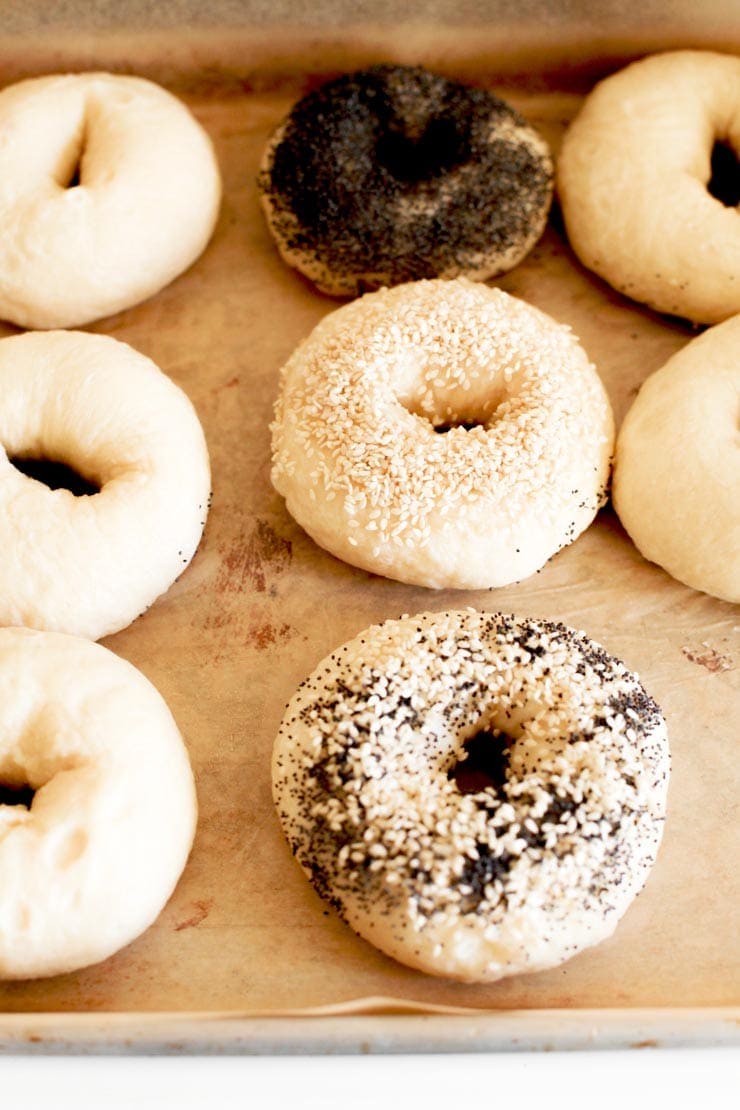
Once the bagels have been topped, bake them. Depending if your oven is calibrated or not (I like to keep an oven thermometer in mine to ensure it’s always accurate), you will need to bake the bagels between 20-25 minutes. Until they’re uniformly golden brown.
Now, here is the difficult part (not really). You’re supposed to let these cool for at least a few minutes once they’re out of the oven, until you can handle them. If you’re impatient like me, I brave through it, slice one open and schmear some cream cheese on mine right away.
Take a bite… Oooh, child!
Homemade New York-Style Bagel Serving Suggestions
There is no right or wrong way to eat a bagel. However, I’ve listed a few ideas and classic options you would enjoy. A schmear is a classic.
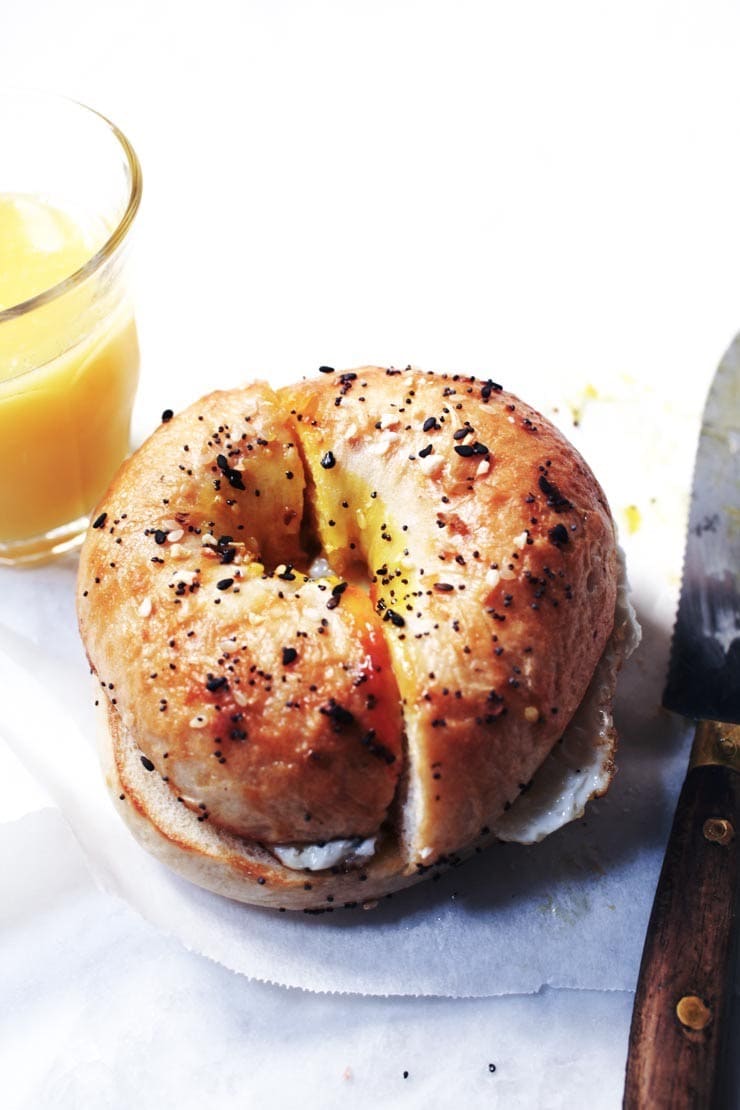
A bagel with lox is also another classic. If you’re looking for a good breakfast idea, go the New York City deli route and make yourself an Egg and Cheese Bagel. Bacon is preferred, but optional.
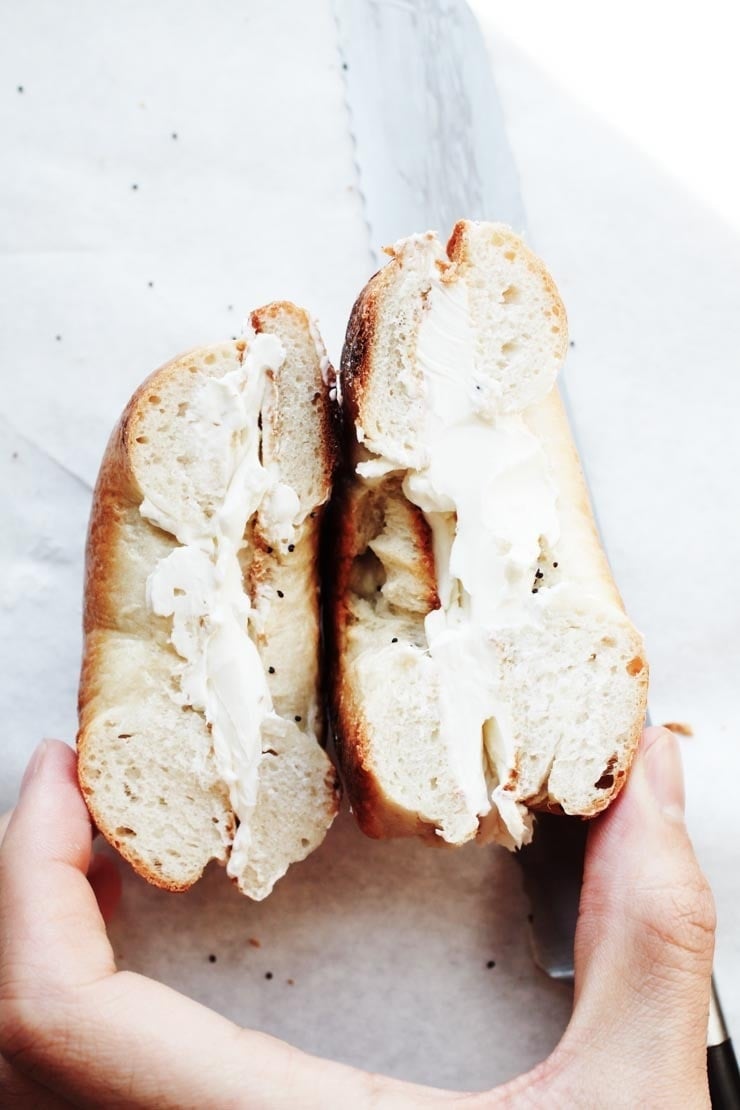
• Bagel with cream cheese– either plain, or your choice of flavored cream cheese. A schmear is a New York classic, and it’s so good.
• Bagel with butter– especially with homemade butter or a delicious French butter. Heavenly.
• Bagel with butter and jam– more specifically homemade butter and homemade strawberry jam– a match made in heaven. Highly recommended!
• Bagel with lox– add a schmear of cream cheese, lox on top, a slice of fresh tomato, red onion, thinly sliced cucumbers, and some deliciously briney capers. Perfection.
• Bagel with Avocado– a nice, healthy option. Toast the bagel, smash a ripe avocado on top, season to your liking, and serve it. Bacon is perfect on top, if you’re into that. Leftover guacamole is also delicious.
• Bagel with Egg and Cheese– this is New York City deli / bodega-style, peeps. Toast the bagel. Butter it lightly. Make an egg and cheese omelet to your liking. Or fry an egg up, over easy, season it with salt and pepper, top it with cheese and bacon. Add ketchup, if you’re into it. If not, add aioli, hot sauce, sriracha, sambal olek, or a combination thereof if you’d prefer that. Cut it in half. You’ll thank me later.
More Everyday Baking Recipes
- New York-Style Soft Pretzels
- Cinnamon Sugar Soft Pretzels
- Perfect Chocolate Cupcakes
- The Best Raspberry and Cream Scones
- Incredible Profiteroles
- Strawberry Pavlova
New York-Style Bagel Recipe
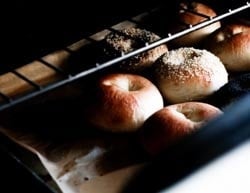
As a native New Yorker, I know there's nothing better than a fresh bagel schmeared with cream cheese. I no longer live in New York City, and I constantly crave the good old-fashioned bagels I grew up on– flavorful, modestly sweet, chewy ones with soft, shiny crusts.
These bagels are made the classic way: You boil them in water for a couple of minutes before you bake them. This is probably one of the most bizarre things a person can do to the dough, but it works. So, if good bagels cannot be found where you live, worry no more; this recipe is infinitely adaptable, and the little bit of effort you put into making these bagels is well worth it.
Ingredients
- 2 teaspoons / 6 g active dry yeast
- 4 ½ teaspoons / 19 g granulated sugar
- 1 ¼ cups / 300 ml warm water (you may need ± ¼ cup /60 ml more)
- 3 ½ cups / 440 g bread flour or high gluten flour (you may need up to 1/2 cup / 60g for kneading)
- 1 ½ teaspoons / 6 g salt
- Optional Toppings: (Refer to Notes)
Instructions
- In ½ cup /120ml of the warm water, pour in the sugar and yeast. Do not stir. Let it sit for five minutes, and then stir the yeast and sugar mixture until it all dissolves in the water.
- Mix the flour and salt in a large bowl. Make a well in the middle and pour in the yeast and sugar mixture.
- Pour 1/3 cup / 80ml of warm water into the well. Mix and stir in the rest of the water (the scant 1/2 cup / 100ml that is remaining), as needed. Depending on where you live, you may need to add an additional couple tablespoons to about ¼ cup/60ml of water. You want a moist and firm dough after you have mixed it.
- On a floured countertop, knead the dough for about 10 minutes until it is smooth and elastic. Try working in as much flour as possible to form a firm and stiff dough.
- Lightly brush a large bowl with oil and turn the dough to coat. Cover the bowl with a damp dish towel. Let rise in a warm place for 1 hour, until the dough has doubled in size. Punch the dough down, and let it rest for another 10 minutes.
- Carefully divide the dough into 8 pieces (I used a scale to be extra precise, but it’s not necessary). Shape each piece into a round. Now, take a dough ball, and press it gently against the countertop (or whatever work surface you’re using) moving your hand and the ball in a circular motion pulling the dough into itself while reducing the pressure on top of the dough slightly until a perfect dough ball forms (as pictured). Repeat with 7 other dough rounds.
- Coat a finger in flour, and gently press your finger into the center of each dough ball to form a ring. Stretch the ring to about ⅓ the diameter of the bagel and place on a lightly oiled cookie sheet. Repeat the same step with the remaining dough.
- After shaping the bagels and placing them on the cookie sheet, cover with a damp kitchen towel and allow to rest for 10 minutes. Meanwhile, preheat your oven to 425ºF / 220ºC / Gas Mark 7.
- Bring a large pot of water to a boil. Reduce the heat. Use a slotted spoon or skimmer to lower the bagels into the water. Boil as many as you are comfortable with boiling. Once the bagels are in, it shouldn’t take too long for them to float to the top (a couple seconds). Let them sit there for 1 minute, and then flip them over to boil for another minute. Extend the boiling times to 2 minutes each, if you’d prefer a chewier bagel (results will give you a more New York-Style bagel with this option).
- If you want to add toppings to your bagels, do so as you take them out of the water. Alternatively, you can use an egg wash to get the toppings to stick before baking the bagels. You may want to use the “Optional Toppings” listed above to top the bagels. Use just one topping, or a combination to make your own Everything Bagel Seasoning.
- Once all the bagels have boiled (and have been topped with your choice of toppings), transfer them to an oiled or parchment-lined baking sheet.
- Bake for 20 - 25 minutes, or until golden brown (I usually err on the side of 20 minutes).
- Cool on a wire rack (Or, if you’re impatient like I am, slice one of these babies open and spread on some of your favorite cream cheese or softened butter. Take a bite… Oh babyyy!)
Notes
Optional Toppings:
Caraway seeds, cinnamon sugar, coarse salt, minced fresh garlic, minced fresh onion, poppy seeds, sesame seeds, everything bagel seasoning, or a mix of your favorite flavors.
Water measurement & similar concerns:
The recipe measurements for the water in the recipe is a guide; not all 1 1/4 cups (300 ml) will be used unless you need it. This is because of environmental factors (humidity, temperature, altitude, etc.) and the flour you are using. The most important thing when making the dough is to make sure it is homogenous and smooth– do not get caught up on the water measurement. If the dough is too firm, add in more water to ensure the dough is not dry and flaky– this has to be done when mixing the dough, not after you’ve allowed it to rise.
For all other concerns, please review past comments and refer to the FAQ below the recipe card for this recipe.
Nutrition Information:
Yield:
8 Medium-Sized BagelsServing Size:
1 BagelAmount Per Serving: Calories: 228.4Trans Fat: 1.4gCholesterol: 0mgSodium: 441mgCarbohydrates: 44.4gFiber: 1.7gSugar: 2.4gProtein: 6g
New York-Style Bagel Recipe: Frequently Asked Questions (FAQs)
The following is a comprehensive list of Frequently Asked Questions I receive about this New York-Style Bagel Recipe. You will find answers to your questions about Yeast, types of flour you can use, and everything you may need to keep in mind when it comes to preparing this homemade bagel recipe and storing the bagels properly.
The Yeast
Can I use fresh yeast?
If you are unable to get active dry or instant yeast, you can use fresh yeast. The general rule of thumb is a ratio of 2.5:1, fresh to active dry. The amount of active dry yeast used in the recipe is only 6 grams, you would need about 15 grams of fresh yeast.
When substituting fresh yeast, you may want to make a few adjustments to the method. Fresh yeast does not need to be proofed like active dry yeast. The water, sugar, and yeast step will be unnecessary in this case, so do keep that in mind. But, as some have told me, they’ve simply substituted fresh yeast for the active dry yeast and followed the steps as directed without any issues.
Can I use instant yeast for this bagels recipe?
You can. Substitute an equal amount. There’s no need to proof the yeast, so add the yeast to the flour with the sugar and jump straight to making the dough.
I prefer less of a yeasty bread-like flavor, how can I achieve that?
You can reduce the amount of active dry yeast to 1 teaspoon in the recipe. Do note: you will have to double the rising time to about 2 hours, instead.
Types of Flour
What if I can’t find bread flour? Can I substitute regular (all-purpose) flour?
If you don’t have access to bread flour, it is okay to use all-purpose flour; they will still come out wonderfully. Alternatively, if you can find vital wheat gluten (it’s usually carried at health food stores), add 4 teaspoons to the all-purpose flour, and you should have a good substitute for the bread flour called for in the recipe.
• Can I make bagels with whole-wheat flour?
Yes, simply use half whole-wheat flour and half bread flour. If you like a milder tasting bagel, you can use white whole-wheat flour.
• Can I use spelt flour for bagels?
Yes. Use 2 cups / 255 g whole-wheat flour and 2 1/2 cups / 315 g sifted spelt four. Alternatively, readers have told me that they’ve made the bagels entirely out of spelt flour with great success.
Preparation
How hot should the water be to proof the yeast?
The water should ideally be between 105F / 40.5C – 115F / 46C.
Can I prepare the bagel dough in my bread maker or KitchenAid / stand mixer?
You can absolutely use either. For a stand mixer: use the hook attachment, and knead the dough on the lowest setting. Do this for 5 to 6 minutes until smooth and springy. If you’re making a double batch, you might not be able to use your stand mixer for kneading. Please refer to the manufacturer’s instructions.
My bagels aren’t smooth. What did I do wrong?
There’s two factors that come into play here: the way the dough is handled and the water the dough is boiled in. Being gentle is crucial to the formation of smooth looking bagels. The less you handle it, the smoother it will be. If you squeeze the dough roughly, it’ll turn out wrinkly. Like many folks, I bake these bagels a lot, and some batches come out smooth and gorgeous, and on bad days some come out wrinkly. It’s all about how you handle the dough, but in the end- it always tastes amazing!
When it comes to boiling, make sure the water is not at a rolling boil. This will also prevent them from looking rough.
How can I achieve an even shinier, sweeter bagel? Can I use barley malt or honey?
Yes! This will achieve a slightly sweeter and shinier product. Use about 1 teaspoon of barley malt in the dough and a generous tablespoon in the pot of boiling water. Because barley malt is not easy to find, I have not made it a required ingredient for the recipe. However, it does add a delicious taste. Alternatively, you can use a couple tablespoons of brown sugar and/ or honey in the boiling water to achieve a similar effect.
Do the bagels need an eggwash before they go into the oven?
No, an egg wash is not necessary, though it does give a beautiful sheen to the bagels. The bagels will be just as beautiful and delicious if you forego the egg wash. This is especially a great option for vegans.
Once boiled, add toppings to the wet, unbaked bagels immediately so that the toppings stick.
My bagels stuck to my pan. What can I do to prevent this in the future?
The original recipe calls for simply using an oiled pan (I’ve edited it). Like many folks, I am paranoid about things sticking to pans, so I use parchment paper or a silpat baking mat (as shown in this post). Feel free to do the same. I do oil the parchment just a bit to add a little bit of extra non-stick protection, but it’s not necessary.
I live at high elevation, what can I do to ensure these come out properly?
I’ve been told by bakers who live at a higher elevation that this recipe works well as is. However, I know that high-altitude baking, especially with yeast, can be a headache as dough tends to rise about 25 to 50 percent quicker than at lower altitudes, so do keep that in mind.
A sure-fire way to ensure that the finished product is not very dense would be to reduce the amount of yeast to 1 teaspoon and allow the dough to rise for the recommended time in the recipe. If the dough has doubled in size after 1-hour, it’s good to start working with. If not, continue to let it rise, checking on it every 15 minutes until doubled in size. Your altitude, brand of flour, humidity, and room temperature are factors that would make the rising times vary.
Can I make the bagels bigger?
You can, just keep in mind that they will need longer to bake. Check on them every few minutes past the 20 minute mark until they are uniformly golden brown.
Make Ahead and Storage
How can I make the dough ahead of time? Can I refrigerate the dough over night?
The best means of making the dough ahead of time would be to prepare it, cover its container with plastic wrap, and rest it over night in the refrigerator. This is called a cold-rise. I often do this and I love this method because it allows the dough to achieve a more complex flavor. If you are doing a cold rise, be sure to allow the dough about 1/2 hour to come to room temperature before working with it.
Can I par-bake the bagels for later baking?
Yes, you can bake them until they are a faint gold tinge (about 10-15 minutes). Cool the par-baked bagels completely before storing them in a resealable bag to be stored in the freezer. To be bake from frozen, bake the bagels for an additional 10-15 minutes, until soft and golden brown.
Can I freeze the bagels? Do they keep well?
Once cool, out of the oven, you can freeze the bagels without any issues. Slice them and then freeze them in a freezer-safe plastic bag, and let them thaw when needed. If you’re planning on toasting them, thawing them is unnecessary.
How long do the bagels stay fresh for?
The bagels will keep in a resealable plastic bag at room temperature for up to 2 days.
Updated May 14th, 2020 – As one of the most popular recipes here and in my book, I’ve received many questions about this bagel recipe. For your convenience, I’ve updated the post with photos, more information, and answers to your Frequently Asked Questions.
Have another question? Leave a comment below!

1,518 Comments
sarah marohn
July 12, 2016 at 8:52 amThe bagels are in the oven and it smell already fantastic :). I had to improvise, since I had no bread flour in house. I used a bit of spelt flour, a bit regular flour, mostly rye flour, half of a cooked sweet potato and a potato . I tossed them with seeds and za’atar and I can’t wait to see how they turned out. I also added around half a cup of honey to the boiling water… I had to do that in previous bagel recipes, and found that it gives the bagels a very nice crunchy sweetness. Thanks for the recipe!
Raleigh
July 20, 2016 at 1:50 pmI love this recipe, have used it several times and it’s always a big hit. My husband is an American/Canadian living overseas and loves the taste of home these create. Just one thing! These take WAY longer than 1h 45 min to make. I would seriously suggest updating that time. Even when I work on them alone, knowing the recipe, they take longer. 5 minutes for yeast + 1 hour for rising + 10 extra minutes after punching + 10 minutes for kneeding + 10 minutes for resting after rolled + 8 minutes for boiling two at a time + 20 minutes for baking = 2 hours 5 minutes. And that doesn’t include any time for measuring ingredients, mixing them, working the dough into balls and then to rings, or cooling for 5 minutes after baking.
These bagels are to die for, and when boiled for 2 minutes per side and topped with a ridiculous amount of sesame seeds, come even close to Montreal delights. But you gotta reserve 3 hours to make these if you want to preserve your sanity.
Jennifer Sharp
July 25, 2016 at 9:58 pmI LOVE LOVE LOVE your cookbook. I recently made three batches of the bagels from the cookbook (whole wheat, blueberry and cinnamon raisin) and they came out fantastic! I hope you don’t mind I blogged about it on my little website, I made sure to give you all the credit! Please let me know if I can add anything more. Thank you again for such an incredible book, I REALLY appreciate the layout and configuration of the book.
Kamran Siddiqi
July 26, 2016 at 1:39 pmHi Jennifer- Thank you so much for the love and the kind words! It thrills me so much that you appreciate the layout of the book :) The entire Chronicle Books team and I worked very hard on it to make it practical and easy to use– so glad we were able to achieve that.
Braeden
July 26, 2016 at 5:28 amI’ve done this several times now and love it. Really beautiful bagels. My one question is how to you roll them in to perfect circles? I find this is the one part I simply can’t do. I don’t mind them being a little bit misshaped but would love to know how to do a ball – I try and (maybe because of the oil in the bowl) the dough sort of won’t stick to itself, if that makes sense? Thanks :)
Heather Garczynski
April 6, 2017 at 10:32 amHi Braeden, I had the same problem. A quick search on Youtube helped alot. Here is one of the videos that I found that shows you how to do it. It made things so much easier and now I can roll a dough ball with very little effort. https://www.youtube.com/watch?v=igOQ444V84U
Bill Schrader
July 29, 2016 at 3:29 pmRE: How to successfully thaw frozen bagels in a microwave.
If you simply “nuke” a bagel for -say- a minute, the crust becomes very tough, and feels stale when you bite into it.
Try this trick:
1. Place a frozen bagel upside down in the microwave
2. Alongside it somewhere in the unit, place a small cup containing about 1/4 cup of plain tap water. [Amount not important; it’s not going to boil]
3. Heat the bagel for 35 seconds [experiment +/- that time] DO NOT OVERHEAT!
4. In my experience, this method yields a thawed bagel whose crust is nearly identical to its fresh, never-frozen original
4, The bagel should be done just until the insides are not frozen.
Tilt
August 1, 2016 at 4:09 pmThe first batch turned out so well yesterday that I made a double batch today. I played around with baking times and discovered that if I baked them for 17 mins it yielded a faint barely golden top with a nice chewy texture. If I baked for 20 minutes the top crust became a beautiful deep golden colour and crispy. Both times yielded a wonderfully golden crisp bottom.
I’m yet to have the pleasure of tasting an authentic New York bagel (but hope to someday)…so I’m not able to draw comparisons between those and this recipe.
I am Canadian, and after tasting this recipe, I believe our canadian bagels are a bit different. The bagels from this recipe were saltier and less sweet than the ones I’m used to. Next time I’m going to try cutting the salt in half to suit my personal taste.
I did make some minor deviations from the recipe:
– I didn’t have bread flour on hand (I generally just use All Purpose for my breads) so I used half white all purpose flour & half whole wheat (Google told me bread flour has a higher protein amount than white AP flour and suggested I use some whole wheat as it has a higher protein content than white AP).
– I then decided to use honey in place of the granulated sugar so I could call them whole wheat and honey bagels.
– I did a cold rise..allowing the dough to rise overnight in the fridge, which in general produces more flavourful doughs.
– In step 8, I dusted my pan lightly with cornmeal (instead of oiling) prior to placing my shaped bagel dough on it. This gave the bottoms a wonderful taste and texture and I highly recommend it.
– I baked my bagels on a preheated baking stone.
– I added 1 & 1/2 tablespoons of granulated sugar to my boiling water. I read in other recipes this adds flavour and enhances the outer crust. I like sweet and felt it couldn’t hurt to do so.
Thank-you Kamran for sharing. I’m quite delighted with the results. I had read in one comment you were planning to develop a cinnamon raisin version, but I haven’t been able to find it on your site. Cinnamon raisin is my favourite! ( Whole wheat and honey is a second runner). If you have a cinnamon version could you please point me in the right direction? Thank you. I’ve recommended your site to family and friends – one of which plans to try your bagel recipe tomorrow. Kind regards.
Anna
August 24, 2016 at 4:16 pmYUM YUM YUM! Thanks so much for this recipe. I made one batch of plain and one batch of cranberry orange. I just subbed 1/4C orange juice for 1/4 cup of the water and threw in a big handful of craisins and a tiny bit of cinnamon. I used AP flour and they still rose beautifully. 4 min in the boiling water gave me perfectly chewy bagels after 20 min in the oven. I don’t know if I’ll ever buy bagels again.
Kaylene
September 4, 2016 at 8:27 pmI came across this recipe on pinterest recently and just had to try it. And let me tell you – they are AMAZING! Thank you so much for sharing this recipe!! I followed your instructions to a T and they turned out fabulously! Definitely worth the trip to the store for bread flour. I mixed up sesame seeds, salt, poppy seeds, dried minced onion, and dried minced garlic to make ‘everything’ bagels. My husband said that we will never have store bought bagels again! I can’t say enough good things about this recipe! Thank you!
Daniel
September 17, 2016 at 7:20 pmI just left New York after vacation and missed the bagels so much that I made them at home according to this recipe. They were really good! However, I found them a little less compact than the ones you get in bagel shops in New York. Do you think that adding more flour makes them even more compact? Also, I wonder if there is any gains in letting the dough yeast for more than an hour, say two-three hours?
Brenda C.
September 18, 2016 at 2:21 pmI would like to make bulk batches of these bagels and shape and freeze them so that they could be thawed and baked a few at a time. I’m thinking I will get them to the boiling stage, boil them, take them out and let them cool/dry, freeze them on sheet pans, and then bag them… I’m thinking then I could take them out and thaw them in the fridge or on the counter and then bake them off in a convection oven… What do you think? Have you ever tried it, or do you have a better suggestion? Looks like I’ll have to do some experimenting…
Javier
September 26, 2016 at 3:11 pmI’ve followed the instructions word for word but after allowing to to rest and rise it was not double in size like you suggested it should be. What have I done wrong or possibly missed. Don’t think this will make 8 bagels.
Liana B
October 1, 2016 at 2:06 amJust made these and they were very good amd have included tips. Half as recipe then added jalapeño amd Parmesan to remaining half – so easy in the kitchenaid mixer. Put in fridge for 3 hours whilst I went out then shaped and put on tray until really soft and springy when Pushed gently with your finger. Picked bagels up after boiling on a slotted egg slice and dabbed bottom w paper towel, brushed beaten egg with a pastry brush then whilst holding over bowl of sesame and poppy seeds, sprinkled over seeds then onto the baking tray with more parmesan on the jalepeno ones to differentiate. Served on a lunch platter with cream cheese, capers, Spanish onion, rocket and chopped semi dried tomatoes. Everyone preferred the jalepeno ones including the 15yo who had said he didn’t like bagels so had sandwiches first…then 2,5 bagels.
Only negative is they’re not as crusty as I’ve made before (recipe lost) and I sprayed the oven to create crust any suggestions?
Melanie
October 2, 2016 at 11:08 pmA double batch of these are waiting to go in the oven right NOW! Forgot to preheat the oven though so I’m just drooling over my everything seasoned bagels until then. Can’t wait to try them in comparison to other bagels I’ve made in the past. They rose beautifully, even from super small dough balls. I’m quite impressed so far.
Susan
October 16, 2016 at 10:19 pmWow!! Just made these. Killer recipe!
Martina
October 19, 2016 at 10:13 amI made these and OMG they were delicious! I had to use all purpose flour because apparently bread flour doesn’t exist in Austria, but they turned out fantastic anyway. Also I had them in the oven waay longer than 20 minutes and had to flip them as well, however, I think the problem is my oven and not the flour.
Jennifer
October 22, 2016 at 7:05 pmMade my first batch today and I feel like an alchemist! I made magic.
The only thing I’d like to adjust is the texture of the crust. I’m a die hard NY’er living in LA and what I miss most is the really hard chewy crust of a NY bagel. Do you think boiling longer? Or adding baking soda to the boiling liquid, the way pretzels are done?
Vale
November 24, 2016 at 8:39 amI added baking soda and a tablespoon of brown sugar and they came out just perfect!
I never tried real NY style Bagels (well to be honest I never tasted a bagel tout court) since I’m Italian, but my friend, who lived in New York for some time, did and said my bagels where perfect!!
jill
October 31, 2016 at 6:04 amoh my oh my oh my. I’m in heaven. Living in Australia, impossible to find a real bagel. got the link to your blog from a friend who had found it whilst living in Denmark, also craving a bagel. THANK YOU!
CassG877
November 2, 2016 at 10:06 pmHi there! If I were to use a bread machine, how much water exactly should I put in?
Thanks!
Lori
November 12, 2016 at 1:36 pmI’m a NYer, born and raised, and appreciate a good bagel. My husband and I are outside of the U. S. for a while and we finally located a good cream cheese and lox but were only missing a bagel, which are not to be found in bakeries anywhere near us. Thankfully, I found this quick recipe online (compared to other 2-day recipes). Made my first batch (half sesame seed, half plain) and love them.
I see you originally posted the recipe around 2010/2011… this is the gift that keeps on giving! Thanks so much and wishing you the best for the rest of 2016.
Leah Gersten
November 14, 2016 at 12:50 pmNew Yorker in Austin.. land of no bagels
Been craving an authentic NY-Style bagel since I moved here. This recipe was easy, quick, and created a delicious bagel with a crisped exterior and the quintessential chewy interior. Thank you so much!
Liz
November 18, 2016 at 4:31 pmLike others, I am also a transplanted New Yorker who moved to San Francisco over a year ago. Although the Mexican food here is DIVINE compared to the offerings out East, and I have found acceptable pizza options out here, the bagel game is sorely lacking. After a year of unsuccessful hunting in and around SF, I decided that I wanted if done right, I was going to have to do it myself. And thank heavens I ended up on your website with this recipe!
I’ve shared these with other NY transplants and they rave about them. I have received many requests for more and I happily point them to this page :)
Thank you for saving my sanity. Seriously.
mase
November 19, 2016 at 2:30 amHi Kamran
May I know how long an interval is acceptable between boiling and baking the boiled bagel.
I have a tiny oven and I can only bake 4 at a time therefore I need to bake them in two batches.
The 2nd batch will be baked 20-25min later – should I keep them covered/refridgerate first?
Will it affect the final bagel texture and tastewise?
Tq for a straightforward recipe – I’ll be using the breadmachine on Pizza dough mode bcos the first batch was on wholewheat rapid mode and b/4 I knew it I found myself smelling a freshly baked loaf of wholewheat bread – lol!
DeAnna Gontz
November 20, 2016 at 9:54 pmI tried this recipe for the first time this morning and did an “Everything” version… They came out Beautiful!! Thank you!! I was so happy with the results, I tried another batch this afternoon and split the batch in half to do 4 Cinnamon Raisin and 4 Cheddar. The Cinnamon Raisin ones came out Beautiful too! The Cheddar, not so much. I knew something was wrong after they boiled… looked like something out of a Wax Museum horror movie. I baked them anyway, 10 minutes longer, and took them out of the oven. Still seemed underdone and gummy. Any suggestions?
Steph
November 25, 2016 at 10:14 pmQuestion, I have a proofing option on my oven, if I were to use this what temperature would i set it at? Thanks, Im excited to make these.
Kamran Siddiqi
December 2, 2016 at 1:44 pmHi Steph! Great question; I’d put it on the lowest setting possible– the lower the better (doing so will allow the dough to develop good flavor).
Normally proofing drawers / proofing ovens are used to rush the rising process, which means the flavor of the bread is sacrificed a bit. A nice and slow rise will normally create a nice and flavorful dough.
Steph
December 5, 2016 at 1:27 amThanks! I realized it’s only got one temperature setting which is 100 F, I would imagine that be a low enough temperature :)
Shanice
December 4, 2016 at 10:18 pmhi I want to make these bagels but I only have instant yeast available, how should I modify the recipe to make it work? thanks so much in advance!
Kamran Siddiqi
December 4, 2016 at 10:36 pmHi Shanice- Great question! You can go about using the same amount of yeast as called for in the recipe, and follow the recipe as you normally would. The beauty of instant yeast is that you can add it directly to the flour without having to dissolve it in water, but it also works just as well when it’s dissolved in water (like in this recipe). I hope that helps!
Shanice
December 5, 2016 at 7:43 amthanks so much kamran! I also wanted to ask, how long can these bagels be kept and how should they’ve kept?
Leo Kolodziejczyk
December 11, 2016 at 8:54 pmMultiplied your recipe by 4 to make 32 of them. Used a hobart mixer with dough hook and followed the proofing instructions that was listed. Any suggestions to make the bagels smoother? They were a little rippled after they got out of the boiling water. Definitely a lower temperature and time when using a convection oven. 400 degrees at 15 minutes was perfect. Did the new york style 4 minute boil technique that was recommended. Chewy perfection. Had to make them 4 different ways as they came out of the water. Plain, Sesame, Jalapeño cheddar and Everything…. (Garlic, Onion, Carroway seed, Poppy Seed) Served them with a pound of cream cheese, and some smoked salmon to 2 dozen hungry campers. AMAZING!!!!! They all loved them. No comparison to packaged or frozen bagels. Worth the time to make a quality product.
Angel
December 25, 2016 at 5:27 pmThe best NY style Bagel recipe ever !!!
Thank You from Me and My family :)
We moved here to TN 10 years ago and need to drive 40 minute to get a half way decent bagel …
Now thanks to your Bagel recipe, we can enjoy them whenever, fresh baked here in our home :)
I baked them today, for Christmas morning breakfast
Everyone was so surprised and enjoyed them so so much ….
Taste, texture, everything was Exactly like the bagels in Long Island and Queens, New York, we grew up enjoying
Thank you
Merry Christmas & Happy New Year
Angel
Barbara
December 28, 2016 at 9:07 pmIn reading through many of the comments, I notice some people are having issues obtaining Bread Flour. I also have that issue, and I worked through it by adding a teaspoon of Vital Wheat Gluten to my AP flour. This helped increase the rise.
Birgitta
December 30, 2016 at 7:08 amWe have been in Germany for 3.5 years now and when we get back home we run to the bagel shop for breakfast…. We had a slow X-mas break this year and I found this recepie. Made them this morning and they turned out great! Chewy and sooo yummy. I grew up in Sweden and I am not used to bake with dry yeast so I substituted the dry yeast with 20g fresh yeast, dissolved in water with sugar before adding salt and flour. I used a blender, Ankarsrum/Electrolux, and blended for 5 min before rising.
Robin Bartholomew
January 1, 2017 at 2:45 amWhen following the recipe isn’t the breakdown of the sugar wrong? Should we use one and a half tablespoons or 4 1/2 teaspoons? I am a novice Baker and just want to do this recipe right. This will be my first time trying it tonight
Sam
January 19, 2017 at 8:09 amRobin it is just a conversion. 1 1/2 tablespoons = 4 1/2 teaspoons so that way if you have one or the other you can still do it :) hope they turned out ok.
Chris
January 2, 2017 at 7:53 amThe first edible masterpiece (I love how I call bagels edible masterpieces…)
Shut up.
Joanne
January 17, 2017 at 3:22 pmoops, i have used unbleached flour and it’s not rising like it should after an hour. Can you tell me if it can be corrected at all at this step? thks.
Kamran Siddiqi
January 20, 2017 at 1:19 amHi Joanne– If you used unbleached flour, that would be okay too; it shouldn’t have affected the rising of the dough. A couple things could have prevented your dough from rising: room temperature, expired yeast, not kneading the dough enough, using water that’s too hot for the yeast to handle… Do feel free to send me another note and I’ll be happy to help you troubleshoot :)
Nick Z.
January 20, 2017 at 12:45 pmI just made my first batch of homemade lox, and I’ve been making my own cream cheese (well, creamy kefir-cheese) for years. This is the next logical step. Looking forward to trying this recipe tomorrow!
FiFi
January 23, 2017 at 12:44 amHello Kamran,
Amazed by how high the success rate of your bagels! So many happy faces here from around the world.
Just one quick question, if I were to add blueberries (attempt to add fresh ones), which step should I fold them in? First proof or second proof?
Also, since blueberries contains pulps and juice, would you recommend to reduce water? If so, how much less?
One last question, I heard some people add barley malt syrup and baking soda during the boiling process. Have you tried that? Wonder why and how they will affect the results!
Novice baker (a.k.a your fan),
FiFi
Halinka Burke
January 27, 2017 at 12:51 pmSo I love these but I can’t for the life of me make them into a ball without the bottom getting or gnarly. When I try to make the hole the gnarly parts tend to separate. They still taste good but not the perfect round I am seeing in the picture. This last time I did not make them into a ball and just gently formed them into a round and made the hole. They seemed more puffier so question is, are they supposed to be shaped into a ball because it does tighten them up a little or can I bypass that step?
Glenna Kennedy
January 30, 2017 at 7:56 pmI had the pleasure of visiting New York last summer and trying an original New York bagel. They are beyond compare to anything you can buy in a store or otherwise. I’m an avid baker so am going to try this recipe. My question is…husband loves cinnamon/raisin bagels and wondered when and how to put the add ons into the recipe.
Dave
February 9, 2017 at 5:05 amHoly Crap!! I’ve just made my second batch of these babies… they are amazing!! Needless to say, neither batch lasted very long, the family devoured them almost instantly!! Thanks so much for the recipe!!
Tara
February 12, 2017 at 3:31 pmI have read and made this recipe many times now with wonderful results. But I for the life of me cannot wrap my head around the part when you tell us to add water. It sounds as if the yeast should be rising in a half cup and then added to the well of the dry ingredients. Then you tell us to add a 1/3 of a cup of the remaining water. Then tell us we may need to add a quarter cup more. If I add all three of these numbers up I still end up using less water than in the ingredient list. When I follow this recipe as you have written, my dough ends up very dry and I have to add much more water. I made them again today and used exactly 1 1/4 cup of water to make the perfect dough. I let the yeast proof in 1 cup of warm water then slowly added the last quarter. Which is the amount that the recipe calls for. Is there a step missing or am I just reading this completely wrong? Its been driving me NUTS. I adore this recipe by the way. Thank you to the moon and back for sharing.
Lisa Ohland
February 20, 2017 at 1:24 pmMy cousin in DC made these and loved them – so I figured we’d give them a try. I bought your Hand Made Baking – and have already bookmarked a dozen other recipes I’ll be trying. So far, I’ve made the Butterfly Cookies and these bagels. These absolutely, ridiculously delicious bagels. We live in NY – on Long Island – and there’s literally a bagel store every mile or so. Or possibly every 500 feet. But NONE compare to how incredibly delicious these were right from my oven. I ordered King Arthur Everything Bagel topping, made some with sesame seeds, made mine 1/2 topped with sesame seeds and 1/2 coarse salt. Seriously DELICIOUS!! I’ll have to play around with making some egg everything – as most of our kids like those. So now tell me when you’ll be having a class to teach us how to perfect our skills and make some of these other goodies. We’ll even come to Jersey!
Victoria
February 23, 2017 at 1:31 pmDoes anyone have step by step photos? I used 1.5 cups whole wheat flour, 2 cups white with the suggested amount of water. The batter was shaggy at first so I added more water, then it got very tough- no air bubbles. Only expanded a tiny bit– maybe too much water or too hot water? They are tasty and nice and brown on the outside but pretty tough and doughy on the inside. Thanks for advising!
Rande Shaffer
February 23, 2017 at 3:58 pmI would like to make Flagels (flat bagels). Would the dough need to be flattened after they are boiled, before boiling or not boiled at all and just flattened and topped with seeds, etc. and baked?
Michael Sattan
February 26, 2017 at 9:49 amThis was a hit in my household, I think I really surprised my wife that I could actually make a good bagel. Her only question was when I was going to make her favorite cinnamon raisin. I scrolled through all 700+ comments and could find an update, I may have missed it. Just curious how much I would put in and when? I thought about possibly splitting the batch for a couple plain and the others her cinnamon raisin.
Thanks for the great recipe, seems like a lot of folks have enjoyed some fantastic bagels at home!
Brianna
March 1, 2017 at 10:03 amI recently moved to the U.K. from New York, and man, I miss my bagels (and pizza and pickles and everything else NY/America has that the U.K. doesn’t). I tried making these last night, and besides adding a touch too much salt to the everything bagels (whoops!) these came out GREAT. Comparable to the bagel shops back home. I can’t wait to experiment with a ton of different flavors! Thank you so much for this recipe!
Linda. Brunelle
March 8, 2017 at 12:33 pmI want to try this recipe as our only decent bagel shop has closedated and we are devastated. I want to top them with toasty onions. Can you tell me what to use or how to prepare the minced onions for that toasty onion Bagel? Do I toast them first or let the baking phase do it?
jessy
March 8, 2017 at 11:25 pmI made these with cinnamon, yet to try one. looked good, thanks for the guide.
Jeff Wiener
March 16, 2017 at 2:10 pmDo you have a New York hard roll recipe?
Been trying to find one fir years.
Tim Dillon
March 31, 2017 at 2:51 pmi live at 9600 feet elevation and these come out great bit dense as expected due to altitude but best i have had in Colorado yet great recipe
Katherine
March 15, 2018 at 10:28 pmTry using a pinch or two less yeast. In my experience, at high altitude, yeast breads actually rise too much (and then fall), so you need a little less yeast. Make sure you proof the yeast (step 1) at 105-110 degrees F. Too hot will kill the yeast and too cold will not activate it.
Heather Garczynski
April 6, 2017 at 10:15 amI recently bought a twenty-five pound bag of bread flour and came across this recipe. The first time I made them, I had trouble getting a good rise out of the dough because being cold outside my house is kind of drafty. I also had trouble making them into “Perfect” balls. Thank God for youtube. The next time I decided to use my bread maker for the mix/knead/rise process. I followed your directions, putting the yeast, water, sugar in first and letting it sit for five minutes. After five minutes, I started the machine using the dough cycle and let the paddles mix it. I added the flour while it was mixing, shut the lid and waited until the cycle was over. I lightly floured my countertop and knocked the dough back and put it in the shape of a rectangle. I cut it into eight pieces and put each piece on my food scale to make sure they were the same size. 0:4.0 seems to be the size that gets me eight bagels. For those having problems getting the dough to form into a ball without seams, take the dough in one hand. fold the dough over to the bottom rotating the dough a little at a time for a couple of full turns until it is tucked into the bottom and the top is smooth. You can then roll it on the countertop as the directions indicate and the bottoms become very smooth. Instead of poking my finger through the middle, I took a round cake decorating attachment and poked it right through the middle. I then stretched it from the inside to the recommended width. I boiled mine two minutes on each side and baked for twenty minutes. I kept mine plain too, however, it resulted in a huge problem…I cannot keep them in the house. My kids eat them like they are going out of style. I eat mine with cream cheese and jalapeno pepper rings. SOOOOO GOOD. Thank you for making a newbe like me into a bagel queen.
Simon
April 8, 2017 at 10:37 amHi Kamran:
I am as crazy as you. I pick up all the baking technique through webs. I would like to know if the batter proof overnite in the bridge for better flavour?
Isijola oluwashina
April 9, 2017 at 2:05 pmHi, your recipe on bagel bread is fantastic, when I am through with the baking stuff I let you know.