This easy homemade New York-Style Bagel recipe is simply the best! Basic pantry ingredients transform into deliciously chewy freshly made New York bagels.
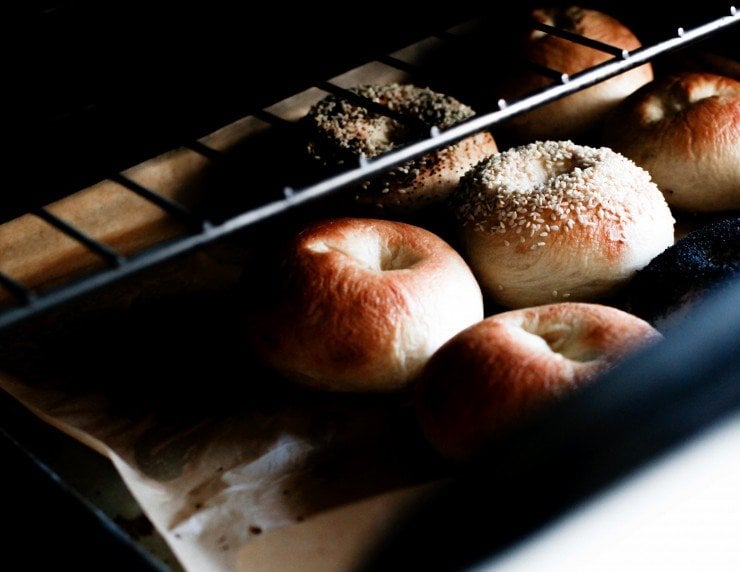
This is simply the best homemade New York-Style Bagel Recipe. After so much love (this recipe has received over 11 years worth on here!), I had to share the recipe in Hand Made Baking, and I updated this page with various photos, tons of tips, tricks, and information you’ll need to achieve the most perfect chewy homemade bagels.
This easy bagel recipe is delicious and results in perfection. It does not need as much dedication as other bagel recipes you will find on the web– you do not need to dedicate 2 days to this. It’s a same-day homemade bagel recipe that comes together in 2 hours.
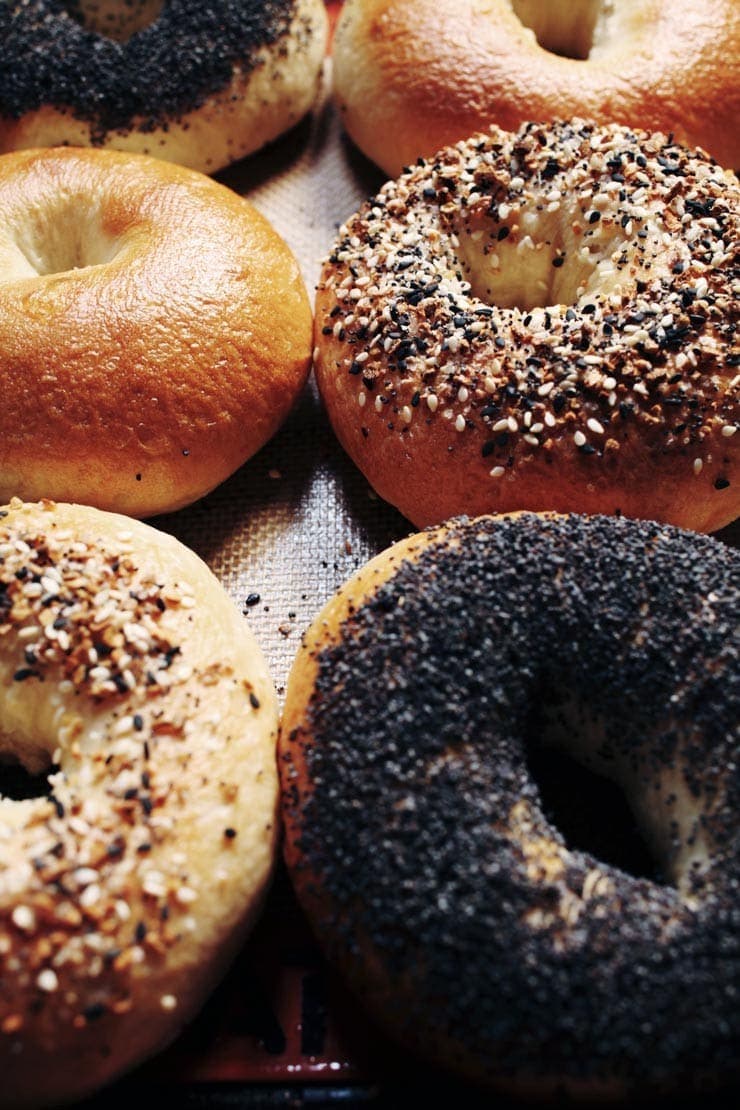
As a native New Yorker, I know there’s nothing better than a fresh bagel schmeared with cream cheese. I have a high standard when it comes to bagels and I don’t put unusual ingredients in mine.
In these bagels, you will not find any yogurt, maple-syrup, or ingredients you might not have in your pantry.
I no longer live in New York City, and I constantly crave the good old-fashioned bagels I grew up on– flavorful, modestly sweet, and chewy with soft, shiny crusts. These bagels are made the classic way: you boil them in water for a couple of minutes before you bake them. This is probably one of the most bizarre things a person can do to dough, but it just works.
This bagel recipe is a very altered adaptation of one from a cookbook, Ultimate Bread, that I borrowed over a decade ago from my aunt. It was my first introduction to homemade bagels. Over the years, this has become the best bagel recipe that I’ve ever made.
It doesn’t require unusual ingredients or require special equipment to make the recipe. These homemade chewy bagels are a treat fresh out of the oven, but when they’re toasted– oh, my! Can we just say that you’ll be making this bagel recipe time and time again?
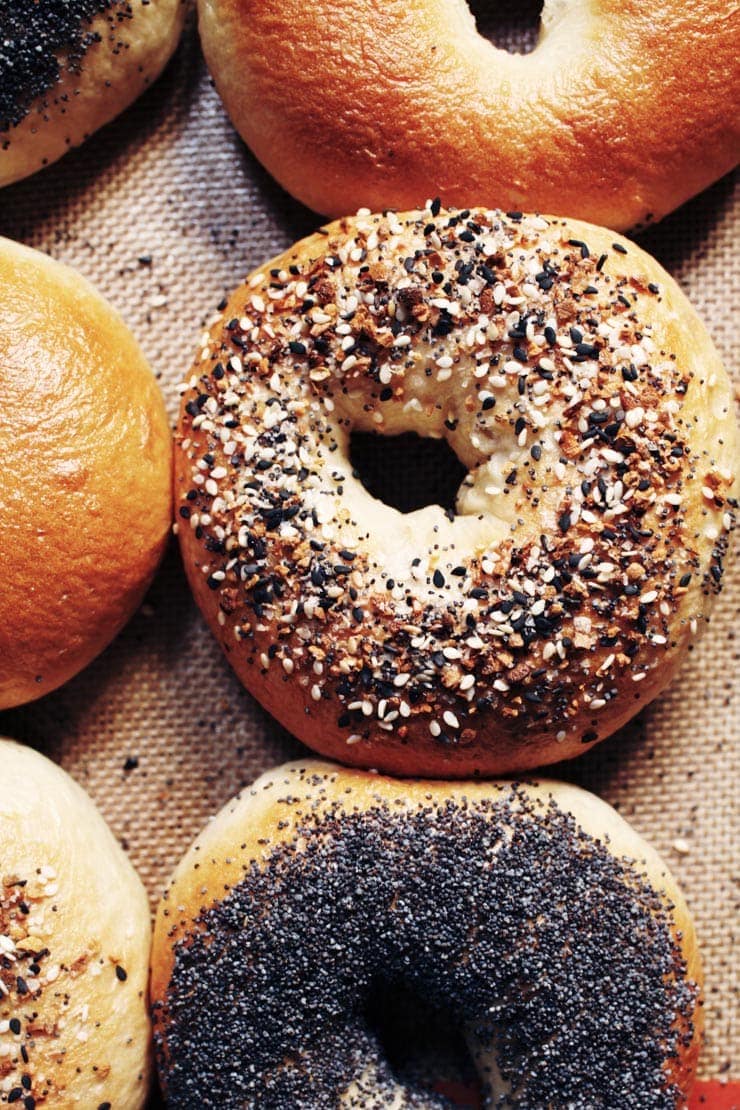
After making this New York-Style bagel recipe on your own, you will feel a sense of accomplishment and satisfaction. I know I always do! This will definitely give some competition to your local bagel shop- the recipe is that good (I mean, look at the comments!).
This homemade bagel recipe is so good that you’ll be impressed with yourself and totally satisfied after you take a nice bite out of one of these freshly made chewy bagels. So, if you mail order bagels from your favorite spot in New York City and pay $7.50 a bagel, save your money!
And if good bagels cannot be found where you live, worry no more; this recipe is infinitely adaptable, and the little bit of effort you put into making these bagels is well worth it. It’s time to get baking!
Homemade Bagel Recipe Ingredients
This homemade bagel recipe consists of four major parts– making and preparing the bagel dough, shaping and boiling the bagels, the bagel topping, and the things you’ll need to serve them with. Here’s what you’ll need:
The Bagel Dough: The Bagel Recipe Ingredients
- Granulated Sugar: This is used to slightly sweeten the bagel dough and to activate the yeast.
Feel free to use natural cane sugar here if you have it. - Active dry yeast: Yeast is used to help the bagel dough form and rise.
- Luke warm water: This needs to be between around 105ºF/ 40.5ºC and 115ºF / 46ºC; this will also help the yeast activate and bind the flour and other ingredients into a smooth, elastic bagel dough. On the rare occasion, you may need more water than listed in the recipe. The water called for in the recipe is a guide– your ultimate goal is to form a smooth bagel dough that is moist and firm.
- Bread flour: Bread flour contains a high protein content, perfect for making homemade bagels that are chewy. All-purpose flour works here too, they will be just as delicious– just not as chewy as ones made with bread flour (Read: New York-Style Bagel Recipe FAQ located below the recipe in this post for more information about flour alternatives for these homemade bagels).
- Fine-Grain Sea Salt: Salt adds the right amount of flavor to the bagels.
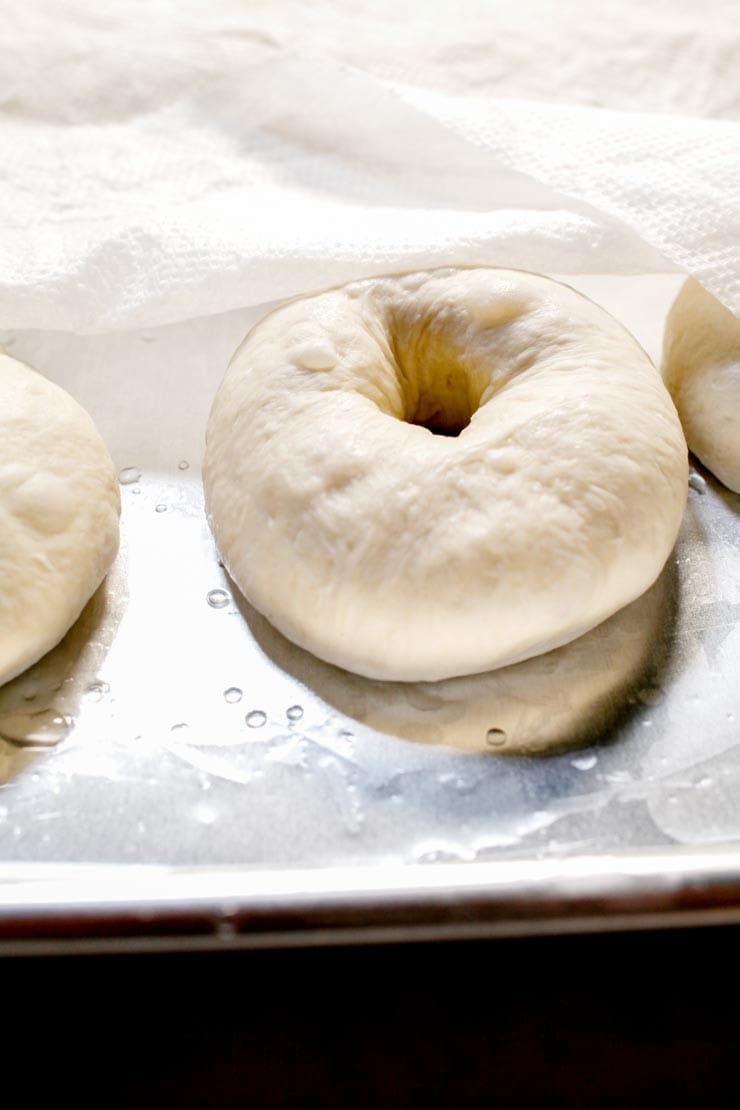
Shaping and Boiling the Bagels
There are many methods in which you can shape a bagel; there is a more traditional method that many bagel shops use– you roll the bagel dough into logs and bind the ends together.
The method used here is done by simply poking the hole in the middle of taught rounds of bagel dough. Once that is done, the bagel rings are gently stretched to about a third of the diameter of the bagel.
After a short rest, each bagel is boiled. This gives the bagels their New York-Style signature delicious, chewy, and shiny crust.
Read more: New York-Style Bagel Recipe FAQ located below the recipe section in this post.
While you can opt to flavor your poaching liquid (there’s more information about this in the FAQ section), I keep it simple here and just use water and these come out perfect every time.
The Bagel Toppings
Favorite bagel toppings vary from person to person. Depending on the day, I like a good homemade everything bagel or a poppyseed bagel. I know many people who are partial to single toppings like minced onion or coarse salt. Whatever you like, definitely customize the toppings to match your tastes.
Everything bagel seasoning, minced fresh garlic, minced fresh onion or shallot, poppy seeds, sesame seeds, caraway seeds, coarse salt, cinnamon sugar- these are just some of the many topping options you can go with to customize the taste of your bagels.
What to Serve the Bagels With
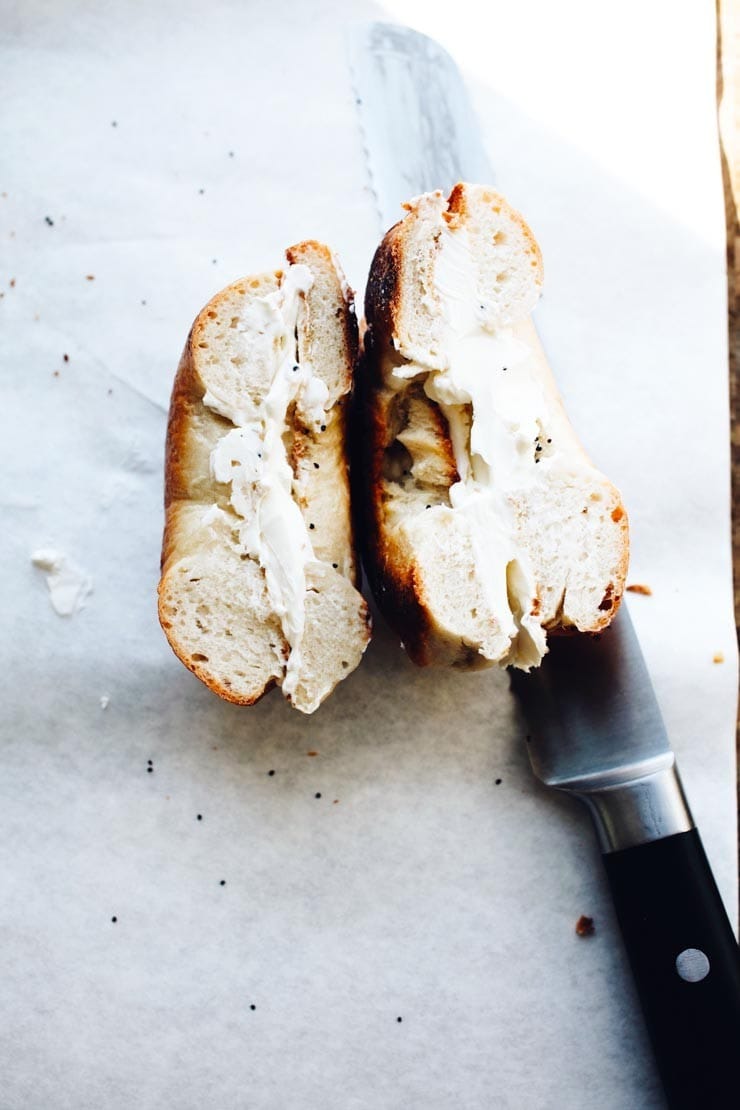
A proper New York-Style bagel always requires a schmear. What is a “schmear” you ask? It’s a generous slather of cream cheese. It’s practically a requirement, especially when these homemade bagels come out of the oven. However, there are multiple ways you can serve them– all of which I have listed within this post.
How to Make Homemade New York-Style Bagels
First, proof the yeast. Proofing basically means you’re activating the yeast. To do this, you will need to add sugar and yeast into luke warm water. After about 5 minutes, the yeast will bubble up; this indicates that the mixture is ready to stir until everything is properly dissolved.
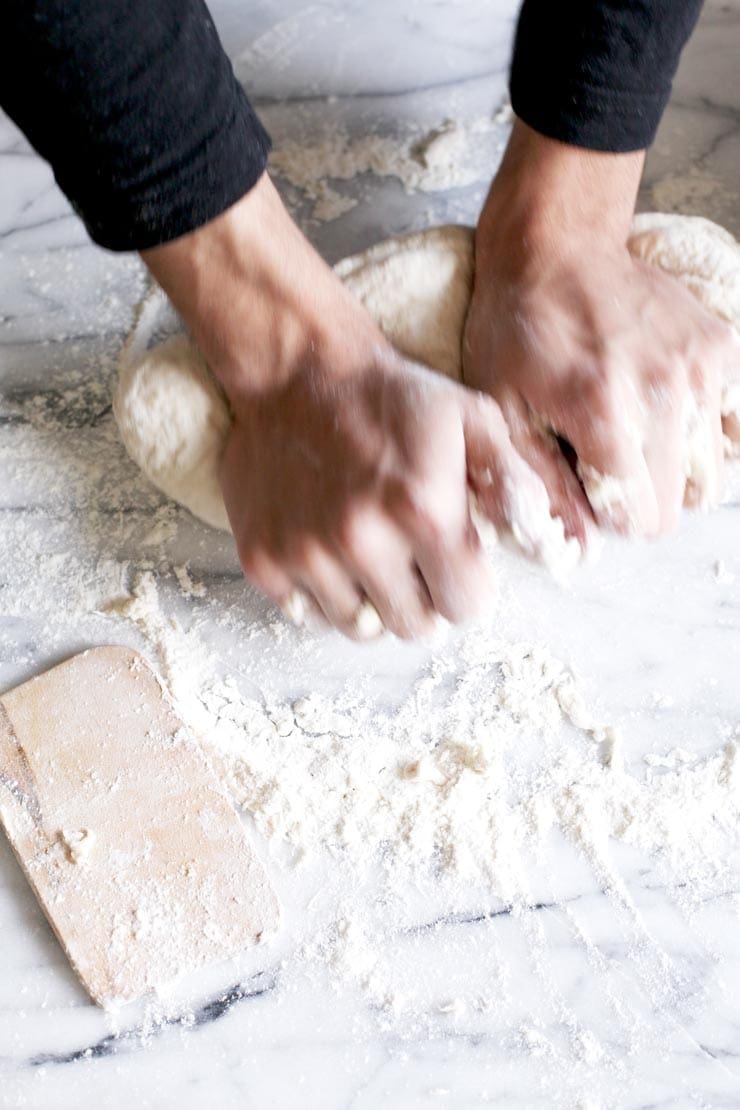
Then, mix the bagel dough together. You can you can opt to make the bagel dough by hand (which I highly recommend if you’re making this recipe for the firs time), or you can do so with a stand mixer fitted with the hook attachment, on the lowest setting (for about 5 to 6 minutes). If you’re making a double batch you might not be able to use your stand mixer for kneading– refer to your manufacturer’s instructions.
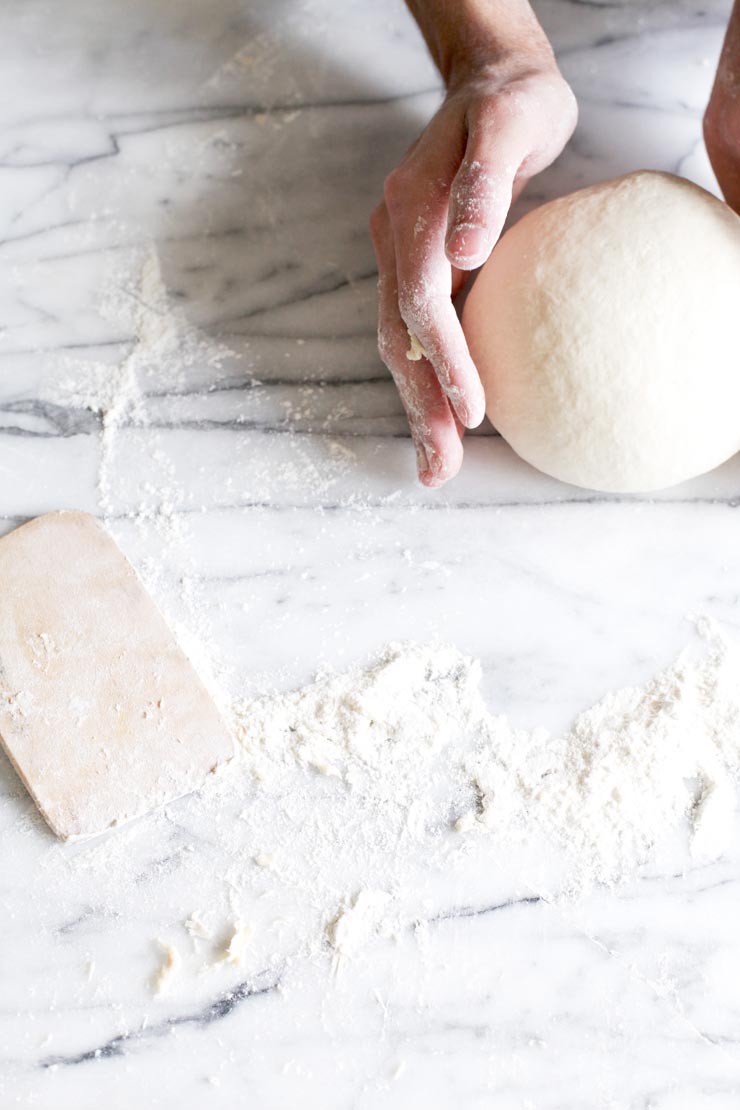
When mixing the bagel dough, you may or may not need the entirety of the water called for in the recipe. You want the bagel dough to be moist and firm after it is mixed. Sometimes you may need more water, depending on humidity, brand of flour, your altitude, climate, amongst many other things.
Once the dough has come together and has been kneaded, place the bagel dough in an oiled bowl to rest for an hour (about 2 hours if you’re using less yeast) or covered overnight in the refrigerator.
Once the bagel dough has rested, you will need to deflate it. You will know it has rested enough when you poke the dough with your finger and the impression remains. If it bounces back, the bagel dough has not risen enough.
If you allowed the bagel dough to rest in the refrigerator, allow it to sit at room temperature for about 1/2 hour before working with it.
Once deflated, divide the dough. It should be divided into 8 equal portions. Feel free to use a scale or eyeball it. You do not have to be exacting about this; just make sure they’re roughly even so that all the bagels bake at the same time.
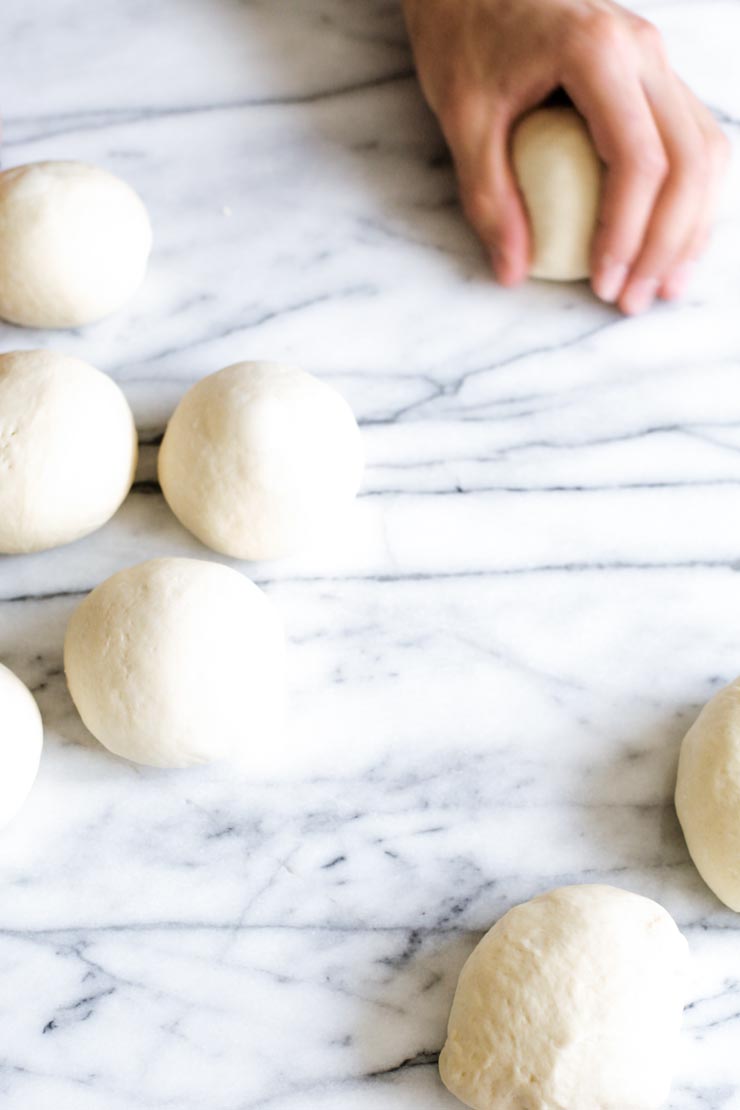
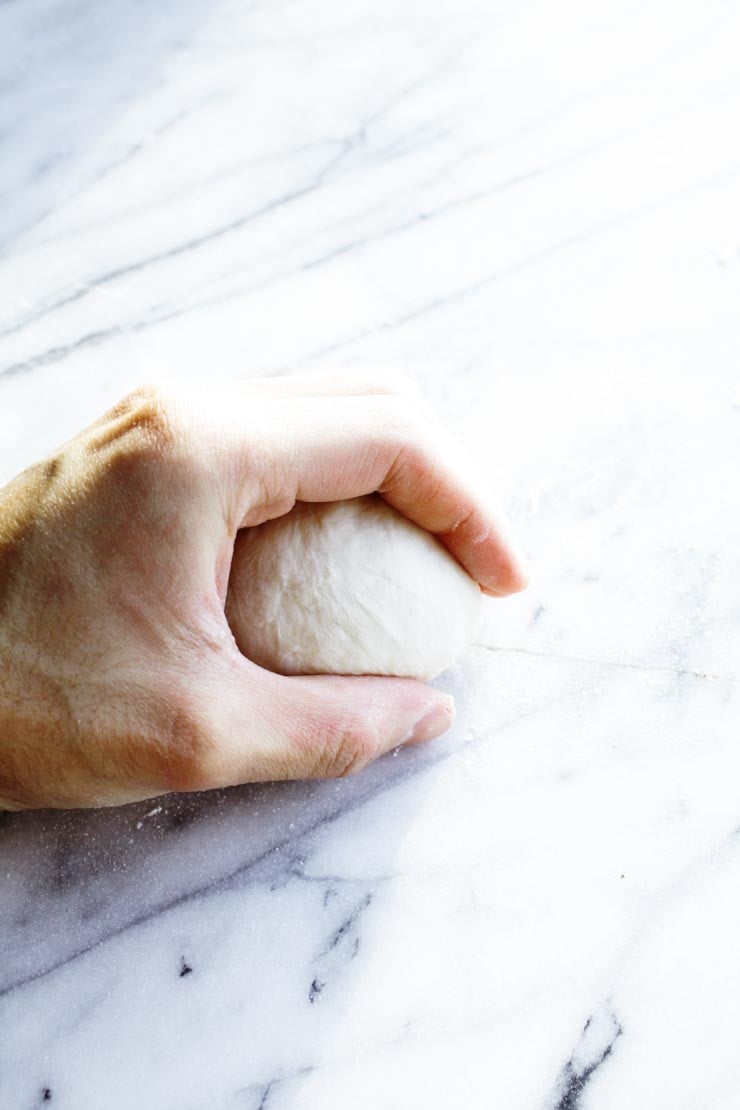
After that, form the bagel dough portions into rounds. Don’t use flour for this step. This is going to sound more complicated than it is, but hold your hand in a C shape while cupping a portion of dough.
Press the dough against the work surface (remember to avoid flouring it) and move your hand and the dough in a slow, circular motion. Allow the irregular edge of the dough to pull onto itself, while decreasing the pressure on top of the dough slightly until a perfectly smooth round ball forms.
Repeat this with the other portions. Have your eyes crossed? This probably does sound difficult at first, but essentially all you’re doing is making the dough round taut by pulling its sides in and keeping it round.
Now, here comes the part when we shape the bagel dough! Working gently and firmly with the dough will result in perfectly smooth bagels.
Simply coat a finger with flour and gently press your finger into the center of each dough ball. Then you stretch the rings out to about a third of the diameter of the bagel and place them onto a prepared baking sheet.
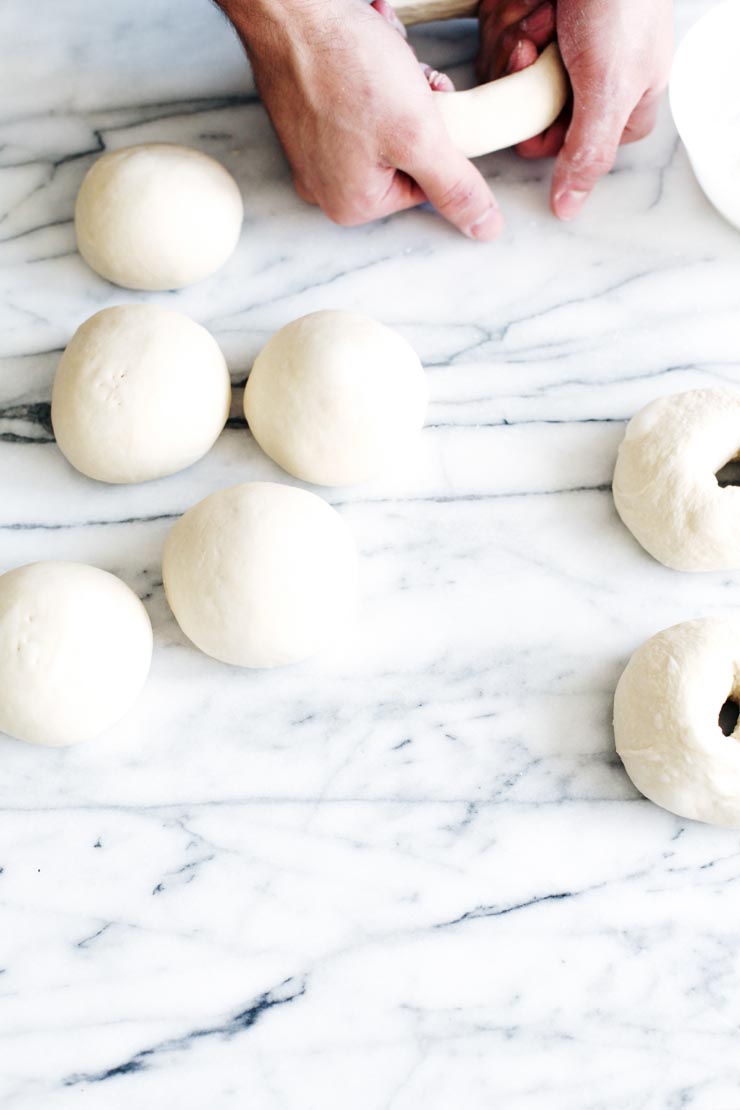
It’s time to boil the bagels. The bagels need a little rest in between shaping and boiling. So, while the unbaked bagels rest, bring a large pot of water to a bubbling boil.
Once it has reached a boil, lower the heat to a simmer. You’ll need a slotted spoon or a skimmer to place the bagels into the water. Some folks like to use small squares of parchment that they cut up before hand. Do what is most comfortable for you.
Handling the uncooked dough with the utmost care will preserve their shape as well.
Boil the bagels and don’t overcrowd the water. Boil as many bagels as you can comfortably fit into the pot. They will puff up quite a bit, so do keep in mind they do need some breathing room.
Once in the water, the bagels will float on the top. Let them sit for 1 minute, then gently flip them over to boil for another minute on the other side.
This will give them a nice crust and their signature New York-Style chew. You can go a little bit longer on the poach, as well. This will give them a stronger crust and chew– more on that in the recipe.
After boiling them, top the bagels! This is the time when you can let your creativity run free. You can use any or all of the topping options listed in the recipe.
Often times I do a combination of toppings to make a delicious homemade everything bagel. Sometimes I just keep it plain or stick to one ingredient on each bagel. Be creative!
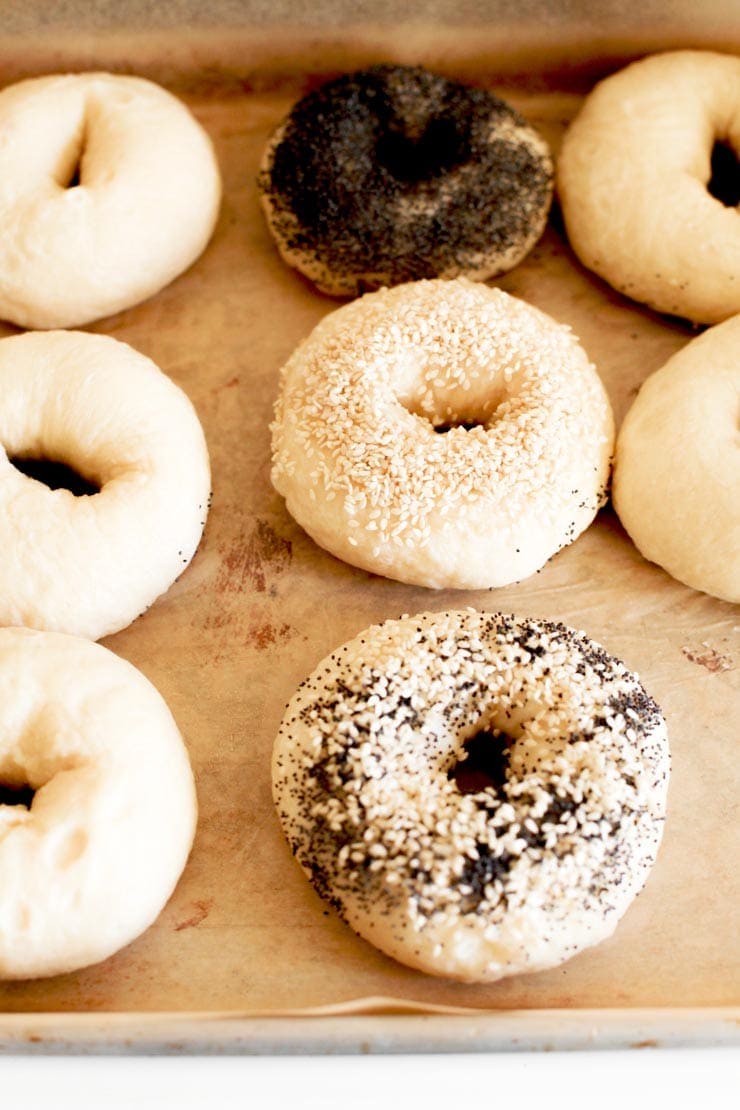
Once the bagels have been topped, bake them. Depending if your oven is calibrated or not (I like to keep an oven thermometer in mine to ensure it’s always accurate), you will need to bake the bagels between 20-25 minutes. Until they’re uniformly golden brown.
Now, here is the difficult part (not really). You’re supposed to let these cool for at least a few minutes once they’re out of the oven, until you can handle them. If you’re impatient like me, I brave through it, slice one open and schmear some cream cheese on mine right away.
Take a bite… Oooh, child!
Homemade New York-Style Bagel Serving Suggestions
There is no right or wrong way to eat a bagel. However, I’ve listed a few ideas and classic options you would enjoy. A schmear is a classic.
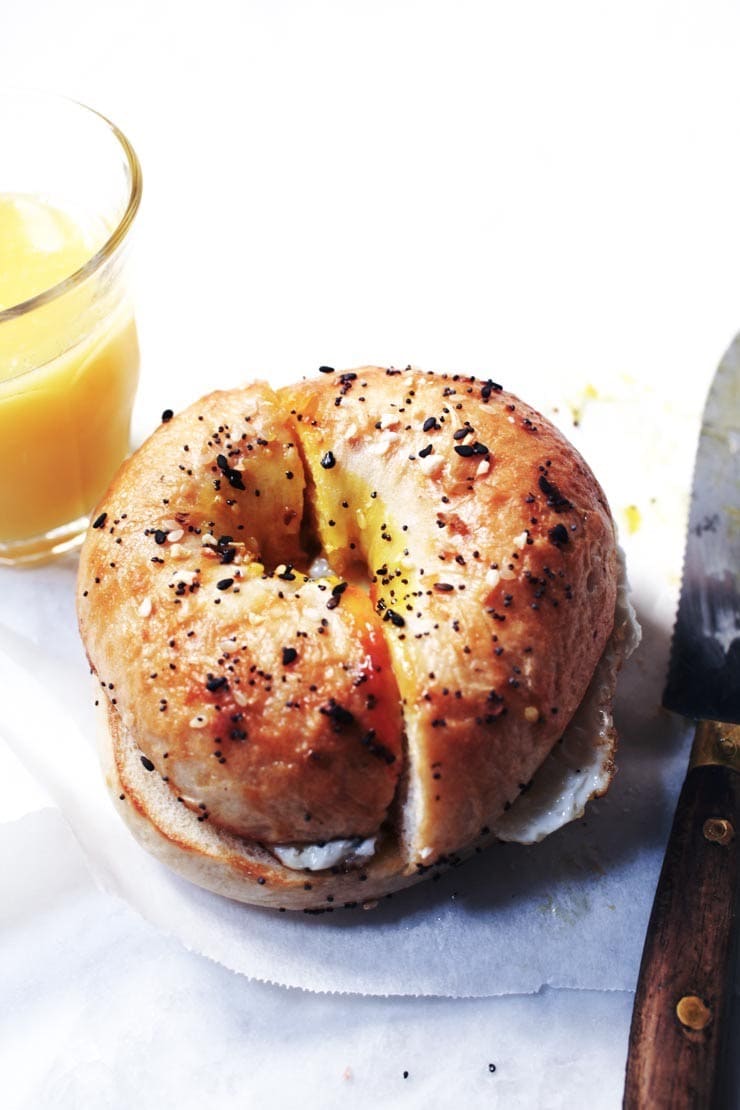
A bagel with lox is also another classic. If you’re looking for a good breakfast idea, go the New York City deli route and make yourself an Egg and Cheese Bagel. Bacon is preferred, but optional.
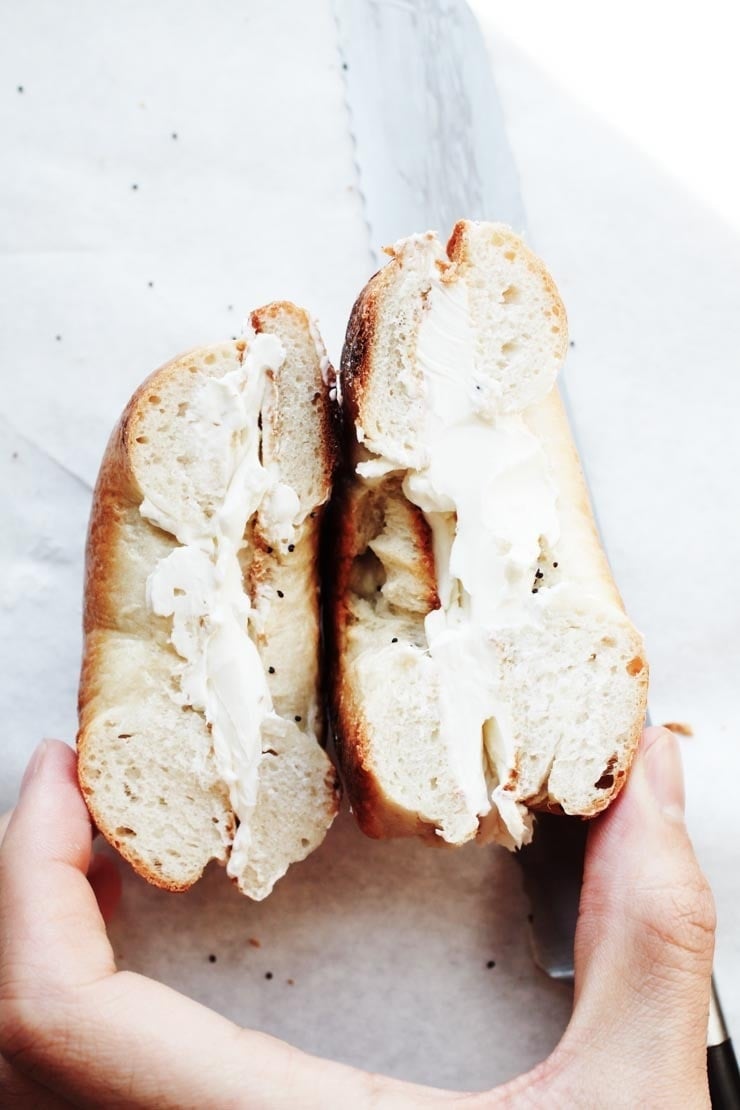
• Bagel with cream cheese– either plain, or your choice of flavored cream cheese. A schmear is a New York classic, and it’s so good.
• Bagel with butter– especially with homemade butter or a delicious French butter. Heavenly.
• Bagel with butter and jam– more specifically homemade butter and homemade strawberry jam– a match made in heaven. Highly recommended!
• Bagel with lox– add a schmear of cream cheese, lox on top, a slice of fresh tomato, red onion, thinly sliced cucumbers, and some deliciously briney capers. Perfection.
• Bagel with Avocado– a nice, healthy option. Toast the bagel, smash a ripe avocado on top, season to your liking, and serve it. Bacon is perfect on top, if you’re into that. Leftover guacamole is also delicious.
• Bagel with Egg and Cheese– this is New York City deli / bodega-style, peeps. Toast the bagel. Butter it lightly. Make an egg and cheese omelet to your liking. Or fry an egg up, over easy, season it with salt and pepper, top it with cheese and bacon. Add ketchup, if you’re into it. If not, add aioli, hot sauce, sriracha, sambal olek, or a combination thereof if you’d prefer that. Cut it in half. You’ll thank me later.
More Everyday Baking Recipes
- New York-Style Soft Pretzels
- Cinnamon Sugar Soft Pretzels
- Perfect Chocolate Cupcakes
- The Best Raspberry and Cream Scones
- Incredible Profiteroles
- Strawberry Pavlova
New York-Style Bagel Recipe

As a native New Yorker, I know there's nothing better than a fresh bagel schmeared with cream cheese. I no longer live in New York City, and I constantly crave the good old-fashioned bagels I grew up on– flavorful, modestly sweet, chewy ones with soft, shiny crusts.
These bagels are made the classic way: You boil them in water for a couple of minutes before you bake them. This is probably one of the most bizarre things a person can do to the dough, but it works. So, if good bagels cannot be found where you live, worry no more; this recipe is infinitely adaptable, and the little bit of effort you put into making these bagels is well worth it.
Ingredients
- 2 teaspoons / 6 g active dry yeast
- 4 ½ teaspoons / 19 g granulated sugar
- 1 ¼ cups / 300 ml warm water (you may need ± ¼ cup /60 ml more)
- 3 ½ cups / 440 g bread flour or high gluten flour (you may need up to 1/2 cup / 60g for kneading)
- 1 ½ teaspoons / 6 g salt
- Optional Toppings: (Refer to Notes)
Instructions
- In ½ cup /120ml of the warm water, pour in the sugar and yeast. Do not stir. Let it sit for five minutes, and then stir the yeast and sugar mixture until it all dissolves in the water.
- Mix the flour and salt in a large bowl. Make a well in the middle and pour in the yeast and sugar mixture.
- Pour 1/3 cup / 80ml of warm water into the well. Mix and stir in the rest of the water (the scant 1/2 cup / 100ml that is remaining), as needed. Depending on where you live, you may need to add an additional couple tablespoons to about ¼ cup/60ml of water. You want a moist and firm dough after you have mixed it.
- On a floured countertop, knead the dough for about 10 minutes until it is smooth and elastic. Try working in as much flour as possible to form a firm and stiff dough.
- Lightly brush a large bowl with oil and turn the dough to coat. Cover the bowl with a damp dish towel. Let rise in a warm place for 1 hour, until the dough has doubled in size. Punch the dough down, and let it rest for another 10 minutes.
- Carefully divide the dough into 8 pieces (I used a scale to be extra precise, but it’s not necessary). Shape each piece into a round. Now, take a dough ball, and press it gently against the countertop (or whatever work surface you’re using) moving your hand and the ball in a circular motion pulling the dough into itself while reducing the pressure on top of the dough slightly until a perfect dough ball forms (as pictured). Repeat with 7 other dough rounds.
- Coat a finger in flour, and gently press your finger into the center of each dough ball to form a ring. Stretch the ring to about ⅓ the diameter of the bagel and place on a lightly oiled cookie sheet. Repeat the same step with the remaining dough.
- After shaping the bagels and placing them on the cookie sheet, cover with a damp kitchen towel and allow to rest for 10 minutes. Meanwhile, preheat your oven to 425ºF / 220ºC / Gas Mark 7.
- Bring a large pot of water to a boil. Reduce the heat. Use a slotted spoon or skimmer to lower the bagels into the water. Boil as many as you are comfortable with boiling. Once the bagels are in, it shouldn’t take too long for them to float to the top (a couple seconds). Let them sit there for 1 minute, and then flip them over to boil for another minute. Extend the boiling times to 2 minutes each, if you’d prefer a chewier bagel (results will give you a more New York-Style bagel with this option).
- If you want to add toppings to your bagels, do so as you take them out of the water. Alternatively, you can use an egg wash to get the toppings to stick before baking the bagels. You may want to use the “Optional Toppings” listed above to top the bagels. Use just one topping, or a combination to make your own Everything Bagel Seasoning.
- Once all the bagels have boiled (and have been topped with your choice of toppings), transfer them to an oiled or parchment-lined baking sheet.
- Bake for 20 - 25 minutes, or until golden brown (I usually err on the side of 20 minutes).
- Cool on a wire rack (Or, if you’re impatient like I am, slice one of these babies open and spread on some of your favorite cream cheese or softened butter. Take a bite… Oh babyyy!)
Notes
Optional Toppings:
Caraway seeds, cinnamon sugar, coarse salt, minced fresh garlic, minced fresh onion, poppy seeds, sesame seeds, everything bagel seasoning, or a mix of your favorite flavors.
Water measurement & similar concerns:
The recipe measurements for the water in the recipe is a guide; not all 1 1/4 cups (300 ml) will be used unless you need it. This is because of environmental factors (humidity, temperature, altitude, etc.) and the flour you are using. The most important thing when making the dough is to make sure it is homogenous and smooth– do not get caught up on the water measurement. If the dough is too firm, add in more water to ensure the dough is not dry and flaky– this has to be done when mixing the dough, not after you’ve allowed it to rise.
For all other concerns, please review past comments and refer to the FAQ below the recipe card for this recipe.
Nutrition Information:
Yield:
8 Medium-Sized BagelsServing Size:
1 BagelAmount Per Serving: Calories: 228.4Trans Fat: 1.4gCholesterol: 0mgSodium: 441mgCarbohydrates: 44.4gFiber: 1.7gSugar: 2.4gProtein: 6g
New York-Style Bagel Recipe: Frequently Asked Questions (FAQs)
The following is a comprehensive list of Frequently Asked Questions I receive about this New York-Style Bagel Recipe. You will find answers to your questions about Yeast, types of flour you can use, and everything you may need to keep in mind when it comes to preparing this homemade bagel recipe and storing the bagels properly.
The Yeast
Can I use fresh yeast?
If you are unable to get active dry or instant yeast, you can use fresh yeast. The general rule of thumb is a ratio of 2.5:1, fresh to active dry. The amount of active dry yeast used in the recipe is only 6 grams, you would need about 15 grams of fresh yeast.
When substituting fresh yeast, you may want to make a few adjustments to the method. Fresh yeast does not need to be proofed like active dry yeast. The water, sugar, and yeast step will be unnecessary in this case, so do keep that in mind. But, as some have told me, they’ve simply substituted fresh yeast for the active dry yeast and followed the steps as directed without any issues.
Can I use instant yeast for this bagels recipe?
You can. Substitute an equal amount. There’s no need to proof the yeast, so add the yeast to the flour with the sugar and jump straight to making the dough.
I prefer less of a yeasty bread-like flavor, how can I achieve that?
You can reduce the amount of active dry yeast to 1 teaspoon in the recipe. Do note: you will have to double the rising time to about 2 hours, instead.
Types of Flour
What if I can’t find bread flour? Can I substitute regular (all-purpose) flour?
If you don’t have access to bread flour, it is okay to use all-purpose flour; they will still come out wonderfully. Alternatively, if you can find vital wheat gluten (it’s usually carried at health food stores), add 4 teaspoons to the all-purpose flour, and you should have a good substitute for the bread flour called for in the recipe.
• Can I make bagels with whole-wheat flour?
Yes, simply use half whole-wheat flour and half bread flour. If you like a milder tasting bagel, you can use white whole-wheat flour.
• Can I use spelt flour for bagels?
Yes. Use 2 cups / 255 g whole-wheat flour and 2 1/2 cups / 315 g sifted spelt four. Alternatively, readers have told me that they’ve made the bagels entirely out of spelt flour with great success.
Preparation
How hot should the water be to proof the yeast?
The water should ideally be between 105F / 40.5C – 115F / 46C.
Can I prepare the bagel dough in my bread maker or KitchenAid / stand mixer?
You can absolutely use either. For a stand mixer: use the hook attachment, and knead the dough on the lowest setting. Do this for 5 to 6 minutes until smooth and springy. If you’re making a double batch, you might not be able to use your stand mixer for kneading. Please refer to the manufacturer’s instructions.
My bagels aren’t smooth. What did I do wrong?
There’s two factors that come into play here: the way the dough is handled and the water the dough is boiled in. Being gentle is crucial to the formation of smooth looking bagels. The less you handle it, the smoother it will be. If you squeeze the dough roughly, it’ll turn out wrinkly. Like many folks, I bake these bagels a lot, and some batches come out smooth and gorgeous, and on bad days some come out wrinkly. It’s all about how you handle the dough, but in the end- it always tastes amazing!
When it comes to boiling, make sure the water is not at a rolling boil. This will also prevent them from looking rough.
How can I achieve an even shinier, sweeter bagel? Can I use barley malt or honey?
Yes! This will achieve a slightly sweeter and shinier product. Use about 1 teaspoon of barley malt in the dough and a generous tablespoon in the pot of boiling water. Because barley malt is not easy to find, I have not made it a required ingredient for the recipe. However, it does add a delicious taste. Alternatively, you can use a couple tablespoons of brown sugar and/ or honey in the boiling water to achieve a similar effect.
Do the bagels need an eggwash before they go into the oven?
No, an egg wash is not necessary, though it does give a beautiful sheen to the bagels. The bagels will be just as beautiful and delicious if you forego the egg wash. This is especially a great option for vegans.
Once boiled, add toppings to the wet, unbaked bagels immediately so that the toppings stick.
My bagels stuck to my pan. What can I do to prevent this in the future?
The original recipe calls for simply using an oiled pan (I’ve edited it). Like many folks, I am paranoid about things sticking to pans, so I use parchment paper or a silpat baking mat (as shown in this post). Feel free to do the same. I do oil the parchment just a bit to add a little bit of extra non-stick protection, but it’s not necessary.
I live at high elevation, what can I do to ensure these come out properly?
I’ve been told by bakers who live at a higher elevation that this recipe works well as is. However, I know that high-altitude baking, especially with yeast, can be a headache as dough tends to rise about 25 to 50 percent quicker than at lower altitudes, so do keep that in mind.
A sure-fire way to ensure that the finished product is not very dense would be to reduce the amount of yeast to 1 teaspoon and allow the dough to rise for the recommended time in the recipe. If the dough has doubled in size after 1-hour, it’s good to start working with. If not, continue to let it rise, checking on it every 15 minutes until doubled in size. Your altitude, brand of flour, humidity, and room temperature are factors that would make the rising times vary.
Can I make the bagels bigger?
You can, just keep in mind that they will need longer to bake. Check on them every few minutes past the 20 minute mark until they are uniformly golden brown.
Make Ahead and Storage
How can I make the dough ahead of time? Can I refrigerate the dough over night?
The best means of making the dough ahead of time would be to prepare it, cover its container with plastic wrap, and rest it over night in the refrigerator. This is called a cold-rise. I often do this and I love this method because it allows the dough to achieve a more complex flavor. If you are doing a cold rise, be sure to allow the dough about 1/2 hour to come to room temperature before working with it.
Can I par-bake the bagels for later baking?
Yes, you can bake them until they are a faint gold tinge (about 10-15 minutes). Cool the par-baked bagels completely before storing them in a resealable bag to be stored in the freezer. To be bake from frozen, bake the bagels for an additional 10-15 minutes, until soft and golden brown.
Can I freeze the bagels? Do they keep well?
Once cool, out of the oven, you can freeze the bagels without any issues. Slice them and then freeze them in a freezer-safe plastic bag, and let them thaw when needed. If you’re planning on toasting them, thawing them is unnecessary.
How long do the bagels stay fresh for?
The bagels will keep in a resealable plastic bag at room temperature for up to 2 days.
Updated May 14th, 2020 – As one of the most popular recipes here and in my book, I’ve received many questions about this bagel recipe. For your convenience, I’ve updated the post with photos, more information, and answers to your Frequently Asked Questions.
Have another question? Leave a comment below!

1,519 Comments
Amarsir
March 25, 2021 at 5:42 amAfter shaping my bagels they proof up nicely. But somehow in boiling and baking they end up a bit flat. Any tips how to avoid that?
Kamran Siddiqi
March 25, 2021 at 3:57 pmAmarsir, various factors could have been at play here. Most often it could be the following: they were handled roughly, altitude (if you’re at high altitude; you might want to refer to my notes about this), the water was at a rapid boil instead of a simmer, the bagels over-proofed before boiling (you may want to have the pot of water ready on the stove during step 7 or 8, instead). I hope that helps!
Kail Penner
July 13, 2021 at 7:02 pmI watched the great british baking show (which obviously makes me very qualified to answer this lol) but something they said was that when boiling the bagels, if they boiled them too long, they would go flat. I accidentally left a couple of my bagels in the boil too long, and they did turn out flatter than the others (though not bad, Iʻd reckon!) I hope thatʻs helpful?
Kirsten
March 28, 2021 at 11:51 pmI have made this several times and it’s a big hit! I am in Colorado but from Long Island so it’s nice to have this recipe, I followed your directions exactly and it works out great about a mile high.
Tracey
March 30, 2021 at 5:42 pmMade these bagels for the first time tonight, was so impressed the looked, smelt like bagels and tasted like the real deal.
They had just the right amount of chewiness too definitely will be making these bad boys again
Vicks
March 31, 2021 at 3:35 pmFantastic bagel recipe, these turned out amazingly.
Jennifer
April 3, 2021 at 8:04 amCan you advise as to the right adjustments for a good New York chewy egg bagel.
Kamran Siddiqi
April 6, 2021 at 4:21 pmJennifer, you’d need to add several egg yolks to the dough and use less water. I don’t have exacting measurements published for this as that would be an entirely different recipe.
Vi
April 5, 2021 at 12:42 pmThis is a changing game! After did this recipe I make bagels everyweek now and 8 bagels will be gone in just one day!!! Love it ! Totally recommend!!!!
Kamran Siddiqi
April 6, 2021 at 4:21 pmSo glad they’ve changed the game for you, Vi! :)
Victoria
April 10, 2021 at 3:34 pmI wish I could include photos because these turned out to be absolute beauties!
They had a crunchy outer shell and a delicious chewy inside.
The recipe is easy to follow for any level baker, with super clear instructions and tips!
Kamran Siddiqi
April 13, 2021 at 3:31 amVictoria, that makes me so happy to hear! Happy baking :)
Trevor
April 15, 2021 at 9:43 amLove the recipe and love the way the bagels come out! I don’t know if this has been said elsewhere on here but a good tip for any vegans that want toppings on their bagels can use a flax egg instead of the egg wash which gives a nice golden crust as well as allowing toppings to stick (ie. Everything seasoning)
Kamran Siddiqi
April 15, 2021 at 10:10 pmTrevor, thanks so much for sharing your tip about using flax egg for a nice golden crust! Love it! :)
Tylyn
May 4, 2021 at 7:07 pmCan i apply this same recipe with gluten free flour?
Kamran Siddiqi
May 4, 2021 at 8:06 pmTylyn, yes!
SC
April 15, 2021 at 1:47 pmThe taste and interior texture of these bagels is great! On first try, I boiled a bit more than original recipe stated, not knowing how chewy they would become. Way too chewy! I found biting through to the inside of the bagel was very tough. I’m going to try to boiling only briefly today. Hopefully, that will work.
Olga
April 17, 2021 at 12:29 amLooove this recipe! Any chance it could be adjusted for my gluten free friends? :) thank so much
Kamran Siddiqi
April 17, 2021 at 3:43 amOlga, many people have successfully substituted gluten-free flour for the bread flour in the bagel dough. I’d do it by weight. Hope that helps!
Tova
April 17, 2021 at 10:45 amHi, the alternate instructions for spelt flour says total of 4.5 cups (2 + 2.5 cups) but the original recipe says 3.5 cups of flour. Does spelt require a whole additional cup?
Natalie
April 21, 2021 at 10:25 amI tried the recipe out and the bagels are delicious! It is kinda hard to try and make them into a smooth round ball and then form them. I think that I just need more practice. Can you add blueberries or raisins to this recipe? I’m not sure if adding fresh (or frozen) blueberries would change the consistency of the dough due to the blueberries adding liquid to the dough.
Kamran Siddiqi
April 26, 2021 at 4:17 pmNatalie, you absolutely can add whatever you’d like into the bagel dough. For blueberries, you can simply add in as much as you’d like but you will likely need to add in some more flour as blueberries can make the dough a bit sticky.
Kristen
October 7, 2021 at 2:05 pmWhen would you recommend adding in the blueberries? They’re our favorite type of bagel, and will be making them ASAP!
Bernadette
September 11, 2021 at 2:42 pmOhhhh cinnamon raisin sounds lovely! I’ll have to try that
Licel
April 24, 2021 at 5:28 amLove this recipe! I tried making the bagels today. I had to add about two handfuIs of flour when I poured all the remaining 1/4 cup of water. The bagels still turned out great. They were crispy on the outside and chewy on the inside. I might need to use the eggwash next time since the black sesame seeds kept on falling off. Made some plain ones and with cinnamon sugar, too. Thank you so much for sharing the recipe! Will definitely be making these again!
Kamran Siddiqi
April 26, 2021 at 4:14 pmLicel, So glad everything came out well for you! There’s a few notations about the water in the recipe and the post– it’s not entirely necessary to use all the water, but I’m glad you figure it out!
Sheri
April 26, 2021 at 3:03 pmHave you ever tried adding to the dough? For example, I want to make cheddar jalapeño bagels and I want those ingredients in the dough if the bagel, not just on top.
Kamran Siddiqi
April 26, 2021 at 4:12 pmSheri, you absolutely can! And many people have done the same!
Jules
May 3, 2021 at 2:43 pmI just made these bagels for 1st time and made jalapeño and cheddar ones with the last bit of dough. It works and is super yummy! Love this recipe!!
Shirley
April 26, 2021 at 7:05 pmFollowed the instructions to a “T”. However on step 8 where it says to cover with a damp kitchen towel and allow to rest for 10 minutes, the towel stuck to the dough and was a mess to peel off.
My second batch I omitted covering them with the damp towel and they came out fine.
Kamran Siddiqi
April 29, 2021 at 2:58 pmShirley, it sounds like the dough may have been too moist. However, feel free to use a piece of plastic wrap next time if that’s easier for you!
Michael
April 27, 2021 at 8:05 amHow would you make pumpernickel bagels with this recipe?
Kamran Siddiqi
April 29, 2021 at 2:57 pmMichael, I don’t have an exact recipe for that at the moment, but you will need to substitute some of the bread flour with pumpernickel flour and add some dutched cocoa powder for color.
Anh
April 30, 2021 at 11:30 amI made these and boy they were goooood!!! My husband loves it and the flavor is incredible. Its amazing how much flavor there is from very fee ingredients. I have been trying to make bagel using youtubers recipes and not one could compare to yours!! Thank you so much!
Harmonie
May 3, 2021 at 10:36 pmThis makes the most perfect bagels!! They’re chewy & delicious. I always bake them just a few minutes less than it calls for though, as they brown quick.
Maite
May 6, 2021 at 5:49 pmHi, where I live I can’t find active dry yeast and have only found instant yeast. Do I still need to proof the yeast or can I add it directly to the flour mixture and do I wait the same amount of time for it to rise?? TIA
Kamran Siddiqi
May 7, 2021 at 12:15 amMaite, it’s not necessary to proof. You can add it directly to the flour!
lexi
May 9, 2021 at 10:31 pmAs an 18 year old who is in love with cooking and experimenting with new recipes, this was the perfect new thing for me to try. they came out so so well when i made them last night that i’m making double the recipe today!! the instructions were clear and easy to follow and my bagels turned out absolutely amazingly! Thank you so much for this!!
John W
May 10, 2021 at 2:02 pmGreat success with this recipe, use raw honey for sweetness! It’s almost impossible to get real Bagels in NL!
Boio
May 18, 2021 at 6:08 pmI was working in the USA 11 years ago and I’ve been craving bagels since then. Here in Bulgaria Dunkin donuts is the only place you can get bagels and they are nothing like the taste I remember. This recipe is amazing! I’m glad I decided to try bake them by my own and found this. Thank you for sharing!
Shenell
May 26, 2021 at 2:39 pmHi! Can I use a yeast substitute for this recipe and if so would I be able to cold proof the dough?
Kamran Siddiqi
May 27, 2021 at 12:37 pmShenell- I would not recommend using a yeast substitute.
Miri
May 27, 2021 at 6:20 amLiving in Germany I had to do a quick research on american “bread flour”. Turned out that bread flour seems to be flour 812, which can be mixed with 2/3 flour 1050 (wholemeal) and 1/3 “normal” flour 405. I used spelt flour 1050 mixed with wheat flour 405 which worked out fine. Thank you for the great recipe, won’t be the last bagels I bake!
Amber
June 1, 2021 at 11:00 amWhen exactly would you add in additional ingredients to the dough? For example, a jalapeno cheddar or cinnamon raisin bagel. When is the best time to fold in those ingredients? Thanks so much for this wonderful recipe!
Diane
June 2, 2021 at 1:26 pmWow! I have made these bagels a few times now and they are delicious! I top them with Everything Bagel seasoning and my family loves them. They only last about a day. I would like to make spinach and garlic bagels. Can I use the same recipe? Do I need to decrease the liquid?
Sarah
June 3, 2021 at 4:09 pmI’m up once or twice a night to nurse my new born and am always just famished. While I wait for her to fall back asleep I love toasting up one of these bagels and spreading on some butter or cream cheese.
My and my 3 year old have made these almost every week for the past 10 weeks. Everyone has been enjoying them!
Easy to follow recipe that allows for flexibility through out the day and they come out great every time.
We usually top with homemade everything bagel seasoning but did make some cinnamon raisin ones this week.
Delicious! Thanks!
Michele
June 4, 2021 at 11:27 pmThese are amazing, I really didn’t believe they could turn out so well, love them and kinda fun to make
TMK
June 5, 2021 at 10:31 amAny advice on halving the recipe?
Chrystal
June 7, 2021 at 6:54 pmI couldn’t get my bagels to hold their shape or brown. After about 35 minutes in the oven I broiled them to get them toasty. They tasted great. What did I mess up?
Valerie
October 13, 2021 at 2:30 pmIt sounds like your oven isn’t hot enough. You might want to get an oven thermometer to check the temperature and then adjust accordingly.
Leslie
June 13, 2021 at 11:31 amThis was a fantastic recipe! I followed it exactly and my bagels turned out fantastic. I couldn’t decide on 1 minute or 2 minutes per side, so I split the difference and did 1 1/2. Yummy!
Cele
June 30, 2021 at 1:54 pmThank you 1000 times over for this recipe. My sister and brother-in-law were married on June 21, 1980, and as a fledgling baker in my early 20’s I promised them a dozen homemade bagels to go with their wedding present of a family recipe book. The bagels that I made never turned out. I made them many things over the years but never attempted bagels again. It has become a standing joke that I owe them a dozen bagels. Thanks to your recipe, 41 years later, I am about to give them their bagels. The instructions, detailed notes, and tips made the bagels turn out perfectly. My husband, the resident taste tester, commented on the perfect texture and flavor. You have done a tremendous service to all home bakers and bagel lovers. Thank you
Hannah
July 1, 2021 at 10:38 amHi! I love these bagels but cannot get the dough to double in size or rise – what am I doing wrong?
Thea
August 1, 2021 at 6:27 pmI’m not the author, but there are a few reasons this could happen:
– water is too hot (this will kill the yeast)
– your yeast is expired/dead (if it doesn’t “bloom” or foam up and the water was the right temperature, throw it out and get new yeast)
– the dough was left to rise in an area that was too cool or too hot (too cool and it won’t rise, too hot and the yeast will die)
Hannah K
July 9, 2021 at 5:08 pmHi amazing recipe! You can’t get bagels in my area so they’ve been a huge hit. I’m making quite big quantities now and have read a bit on cold proofing but I wondered… can I make them into balls then poke the holes in the bagels before cold proofing? And if so do I need to let it rise for an hour first then do that? And how long can they be in the fridge before I should bake?
William
July 10, 2021 at 11:54 amCan I make the dough the night before and leave it in the refrigerator?
Cheryl
August 6, 2021 at 4:03 amThe taste, texture and chew was spot on. The only thing was they were not as puffed up as I expected. Can’t imagine why it didn’t, every step seemed perfect, yeast, dough dbl and finger mark pressed in and stayed and other than stretching a little bigger hole than needed, I didn’t mean handle the dough., lastly water was simmer after boil. Thoughts?
Catherine
July 10, 2021 at 6:19 pmThese are incredible! Highly recommend boiling for 2 minutes on each side as well as coating the bagel in egg wash before applying the toppings. They turned out so well in the first go!
Valerie Codron
July 18, 2021 at 3:24 pmMade these bagels today. Followed recipe. Lots of steps and time consuming but came out great. I put Tillamook white sharp cheddar on two, Everything Bagel seasoning on 4 and left two plain. These are legit. Will be making very often.
Liz
July 19, 2021 at 5:05 pmThis is my go-to recipe! I’ve tried many different recipes, and this is by far my favorite! Thanks for sharing.
Question: Can this recipe be doubled/tripled without complications? Would love to be able to make a bigger batch, if possible. Thanks!!
Tom
July 20, 2021 at 5:40 pmIf I wanted to make 4 dozen or more, does just multiplying the ingredients accordingly work for baking?
Ahbra
July 25, 2021 at 8:10 pmI followed the recipe exactly as written, but the bottoms were totally burnt! Is 475° convection or regular bake? I did it on convection and am wondering if this might be the issue.
Kamran Siddiqi
July 28, 2021 at 4:18 amAhbra- the recipe doesn’t call for the use of the convection setting; this is a regular bake.
ADI BABA
August 3, 2021 at 4:29 pmAHBRA it actually says 425 and not 475 read closely
Rob
July 31, 2021 at 5:46 amI’m a regular baker of sour dough however I’ve never made bagels before, always thought they’d be too tricky. Wow was I wrong, these are super simple, super quick (compared with a sour dough loaf) and super chewy delicious. They were such a hit, I had to make a second batch later in the day. Thank you for sharing!!!
Thea
August 1, 2021 at 6:23 pmI’ve made these before, but forgot which recipe it was. I just found it again and made a batch today. They were gone before they’d even cooled, even my dog got his own (plain) mini bagel, and I’ve got another double batch rising right now.
I did a variety, but the clear favourite was the “everything” seasoning, with caraway, smoked salt, and fresh dill added.
I’m vegan, so no egg wash. No trouble with my toppings sticking, but for anyone who does, you can use a flax egg, chia egg, some vegan butter/margarine, plant milk mixed with a tiny bit of agave/maple syrup, or aquafaba.
These are so perfect, thank you!
shannon
August 16, 2021 at 8:54 pmMy bagels came out flat 🥺 please help me figure out what went wrong!
Valerie
October 13, 2021 at 2:35 pmI’m not the author, but here are a few ideas… Did the dough rise at all? If not, you could have had issue with your yeast, like using too hot of water or exceptionally old yeast.
If the dough rise and the. They fell flat in the oven it sounds like maybe they were over-proved. This means you possibly left them longer than needed after shaping the dough into circles. This will build up too much air and they will fall flat when boiling or baking. Hope this helps!
Hannah
August 19, 2021 at 7:30 pmJust want to say Thanks! As a kid, it was a tradition to go out on Sunday mornings with the whole family to buy a dozen hot bagels from our local bagel shop. Living abroad in Australia and due to travel restrictions, it’s been over a year since I’ve seen my family (and eaten one of the glorious bagels). I just made the bagels this morning! They are absolutely amazing! Taking a bite out of a piping hot bagel filled me with so much joy. A little taste of home. Thank you!!!
Bernadette
September 11, 2021 at 2:38 pmAs I sit here and stuff my face with these delicious everything bagels I just had to comment. EASY for even me! Crunchy on the outside, soft/chewy on inside PERFECT! For my first time I used a mixer, but the dough was nice and I could have done by hand. My only gripe as a New Yorker…. We like them bigger LOL so this made smaller type bagels, not minis but smaller. I might do 4 next time.. but they are DELICIOUS
Thank you ☺️
Lisa
September 16, 2021 at 9:02 amHow would I make these into egg bagels?
Lin
September 27, 2021 at 8:56 amThese were awesome bagels. I’ve made them several times but have had to adjust measurements. I actually found this out when I had my scale on ounces and measured the water to the 4oz and noticed it and switched to grams and the grams were 113g and realized that maybe other measurements were off and found that the flour should be 120g per cups. I guess if you use the measurements as written, they should come out fine as all of the measurements are just slightly off. This time I used the corrected ones and it was fine just as I used yours the times before and they were fine. Just thought I mention something I had found by accident. They both work but if you use only some of the measurements, they will not work. Thanks again for a great recipe.
Dogan A
October 1, 2021 at 7:46 pmBaking these following your recipe for almost two years now. The recipe is a charm. Greetings from İstanbul.
Merilyn
October 6, 2021 at 7:12 pmLove these, my husband is from Connecticut and we live in Australia….he thinks these are very authentic :-). I’ve also made sourdough one which are also very delicious but these are so much quicker.
Thank you for the recipe, I’m sharing it with my friends.
Merilyn
Sharmaine
October 10, 2021 at 7:35 amHey, great recipe – finally found some use for my bread flour. However, the top of the bagels are way too hard. Any idea why? This is the second time I’m trying and on both times, the top just gets really hard and not bagel texture.